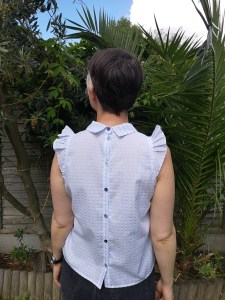
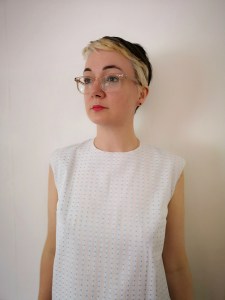
It’s no secret that I’m a big fan of the Juliette shirt; it’s an everyday staple with a bit of edge, and it has so much potential for putting your own stamp on it. I made myself one with pleated cap sleeves and the seamstress curse struck: my sister said, “Can you make me one too?” Of course I happily (*ahem) obliged, and here I’m going to explain how to make your own pleated cap sleeves like these (whether for yourself or a pesky sibling is for you to decide!):

Step 1
Cut all pieces as normal, but don’t cut the sleeves. Make the shirt as per the instructions up to the point where the sleeves are inserted. You can add the collar before or after the following steps, but you may find it easier to envisage how you want the sleeves to sit if the collar is on and the buttons are sewn.
Try the shirt on, you’ll probably find the armholes are sitting at an awkward, slightly-too-wide place. Use tailors chalk to draw directly on the shirt where you would like it to sit (bearing in mind a seam allowance), you may find you want to take in a bit almost the whole way round the arm hole. Just do this on one side of the shirt; you’ll then use that side as a template for the other side so they’re symmetrical.
Step 2
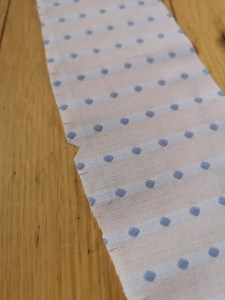
Cut the marked section off in one continuous piece; don’t chop it in small sections. Lay the shirt flat and use the cut piece as a template to cut the other side. It’s near impossible to do this in one continuous piece so I did the back, flipped it and then did the front.

Take a piece of paper and draw around the first piece of fabric you trimmed, marking the shoulder seam. This is going to be the curve that joins the cap sleeve to the shirt:

Working from the shoulder seam mark, measure down 6.5cm from the inside of the curve. Square off this line to meet the sides of your curve:

Now is the really fun maths bit. Make a dotted line straight down from your shoulder seam mark and measure out 1cm from each side of this line:

Cut the whole shape out, and then cut down one of the solid lines (not the dotted one). Stick one side of your shape to a piece of paper and draw a vertical line 1.5cm along from the line you just cut, making sure to keep the straight edge of the sleeve in a straight line. This section will be a pleat! Trim off the excess paper:


Then from the edge of the section you’ve just added in, draw another line 1cm along. Cut down this line and add in another 1.5cm section of paper:

Keep working along, measuring across 1cm, and adding in a 1.5cm section of paper, until you’ve added in 5 sections. It’ll end up a big mess of sellotape and pen, but that’s ok!

Now do the same working the other way from your solid line next to the central dotted line. You’ll end up with one really long piece like this!

Step 3
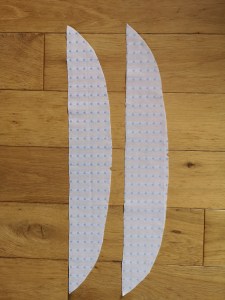
Cut one pair of these from your fabric, cutting little snips using the solid lines as notches, and at your dotted centre line cut a little ‘v’ so you know that’s where to join to the shoulder seam:
It’s much easier to finish the hem of the sleeve now instead of after the pleats are in, so turn the straight edge under by 1cm, then turn this in on itself and stitch down:

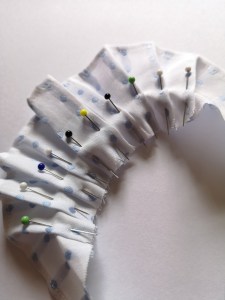
Working from the shoulder seam outwards so the pleats go down the front and then down the back (rather than all facing in the same direction), join each notch to the one next to it to make the pleats. Pin along then baste to hold them in place within the 1cm seam allowance. Give it a good press to set the pleats:

Step 4
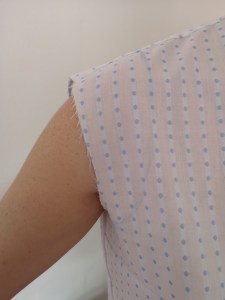
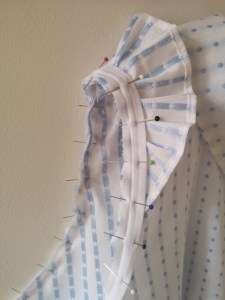
Now to attach your sleeve to the armhole. Start off at the shoulder seam, where you have cut the ‘v’, and place the sleeve and shirt right sides together, matching the seams as far down as they will meet. Stitch this in place at around 7mm, making sure it’s within 1cm:

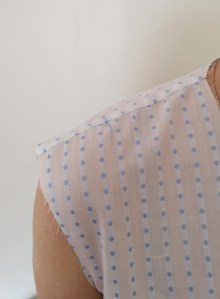
You can see it’s nearly there, but the armhole needs finishing. Take a 12mm wide piece of bias binding and attach it the whole way round the armhole, sandwiching in your cap sleeve. Flip the bias binding under, iron it in place and top stitch the whole way round. This will flip the cap sleeve outwards to it’s sitting correctly, and finish it all off nice and neatly. Give it a good press too to get it looking really sharp:
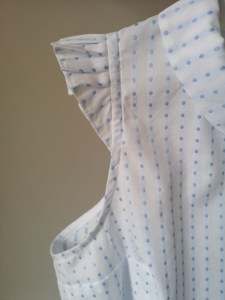
If you didn’t initially, add your collar and buttons, finish the bottom hem of the shirt and enjoy strutting those statement sleeves!