I love a big-volume skirt but an elasticated waistband does me no favours, so I drafted this one with all the comfort of elastic, but a more flattering waistband. With an elasticated back and a flat front waistband, this has come to be called the FFS. The Flat Front Skirt (what else?!).
All this involves is drawing rectangles, so if the sound of drafting a pattern terrifies you, this is the perfect project to try. Also, this has no fastenings, so it’s a quick and easy sewing project!

Drafting your pieces
Front waistband
Measure your waist. Divide this by two to work out the length of your front waistband. Add on 0.5cm ease, then an extra 1.5cm seam allowance at each end.
Make the height 10cm, this is to fit a 2.5cm or 3cm wide elastic.
My front waistband measurement worked like this:
68cm waist divided by 2 = 34cm
Add 0.5cm ease = 34.5cm
Add 1.5cm at each end for seam allowance = 37.5cm

Back waistband
Use your full waist measurement for the length of the back waistband. Add 1.5cm seam allowance at each end.
Use the same height as the front waistband i.e. 10cm.
My back waistband measurement worked like this:
68cm waist
Add 1.5cm at each end for seam allowance = 71cm.
If you’d like added volume you can add on a few extra centimetres. I went for extra volume and cut mine at 81cm wide.

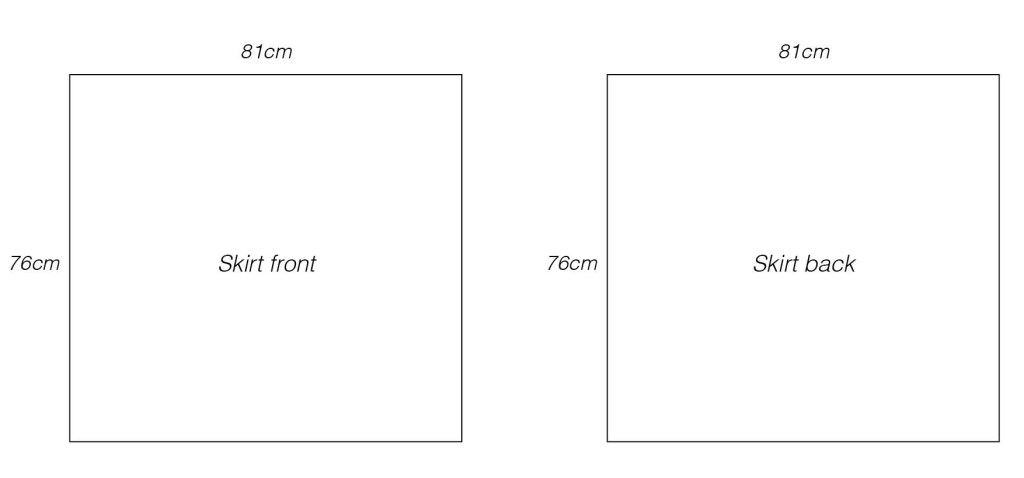
Front and back skirt
The skirt is made of two rectangles of the same size. The width of each rectangle is the same as your back waistband.
The length is dependent on how long you’d like your skirt to be. Hold a tape measure up to yourself and measure down, add on a few extra centimetres if you’re not totally sure as you can always turn it up a bit more at the end. I cut mine at 76cm long and I’m 5’6”.
Cut out your pieces
Cut one front waistband, one back waistband, and two skirt pieces.
It may end up tricky to tell which way up the skirt pieces go, so draw an arrow in tailors chalk on the wrong side of each skirt piece to mark which way up they should be sewn!
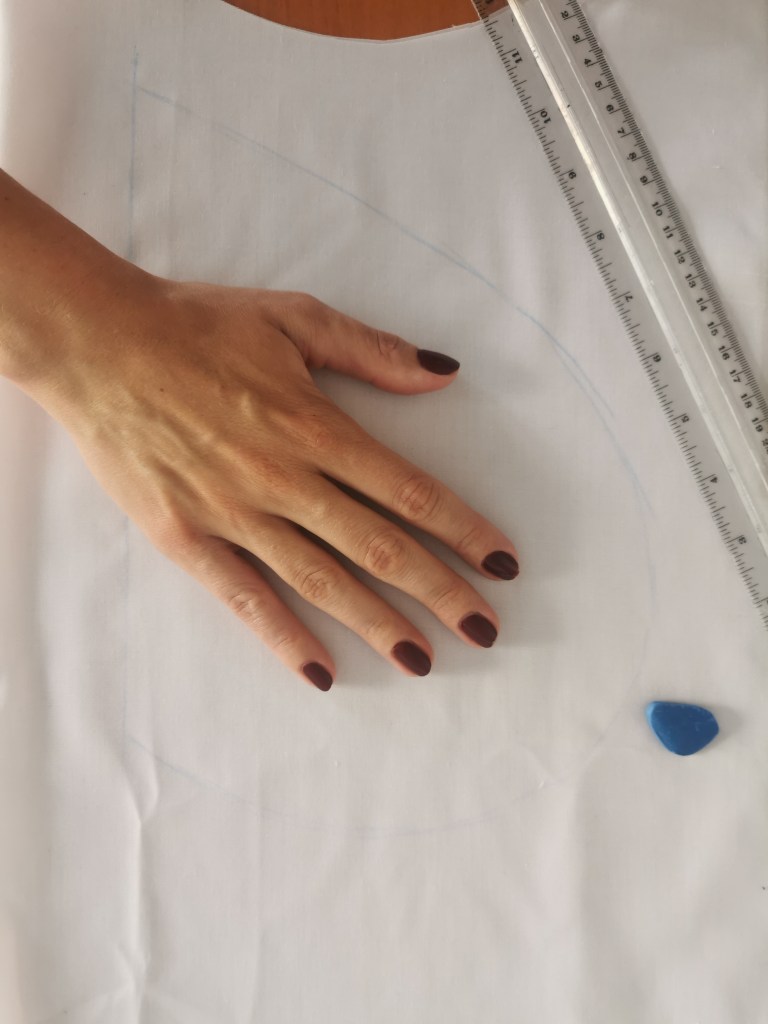
Optional step: Pockets
Hold one of the skirt pieces up to yourself and put your hand where you’d like the pocket to sit. Draw a little mark with tailors chalk at the top of where the pocket will begin. Snip a small notch at this height on both sides of the front and back pieces.
To draft a pocket piece, simply lay your hand on your pocket fabric and draw generously round your hand. You may want to place something within the outline e.g. your phone to check it’s big enough. Bear in mind you’ll lose 1.5cm when sewing, so if in doubt, go a bit bigger!
Then draw a straight line at the side so the edge of the pocket matches up with the edge of the skirt piece. Cut two pairs of pockets.
Time to sew!
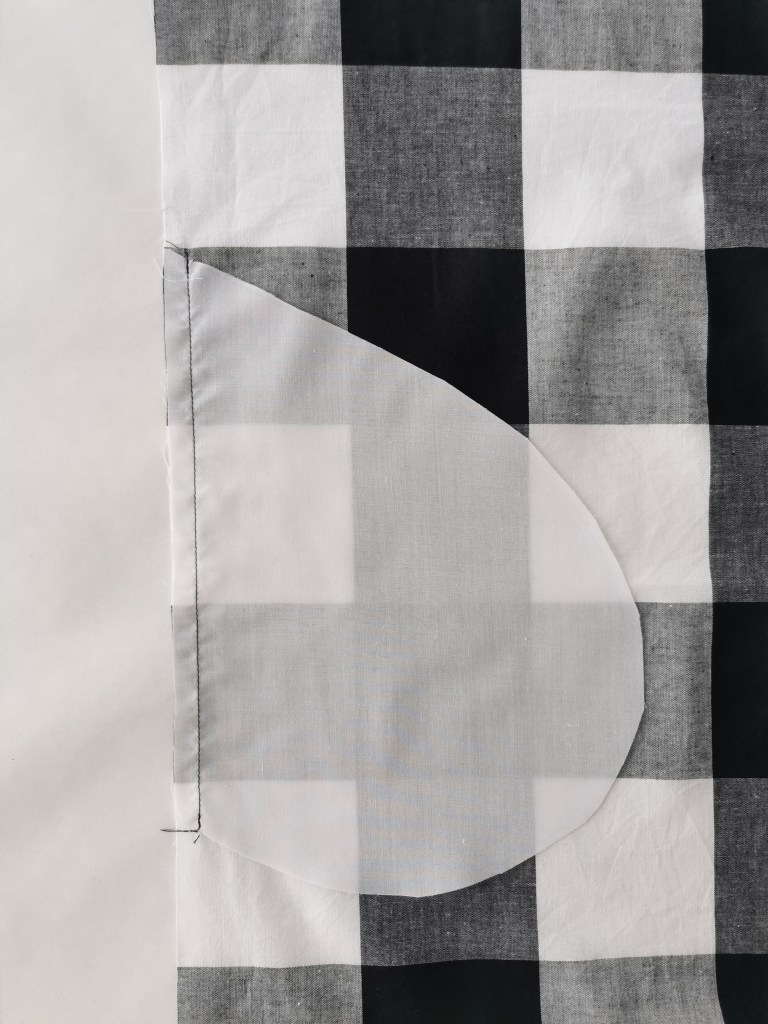
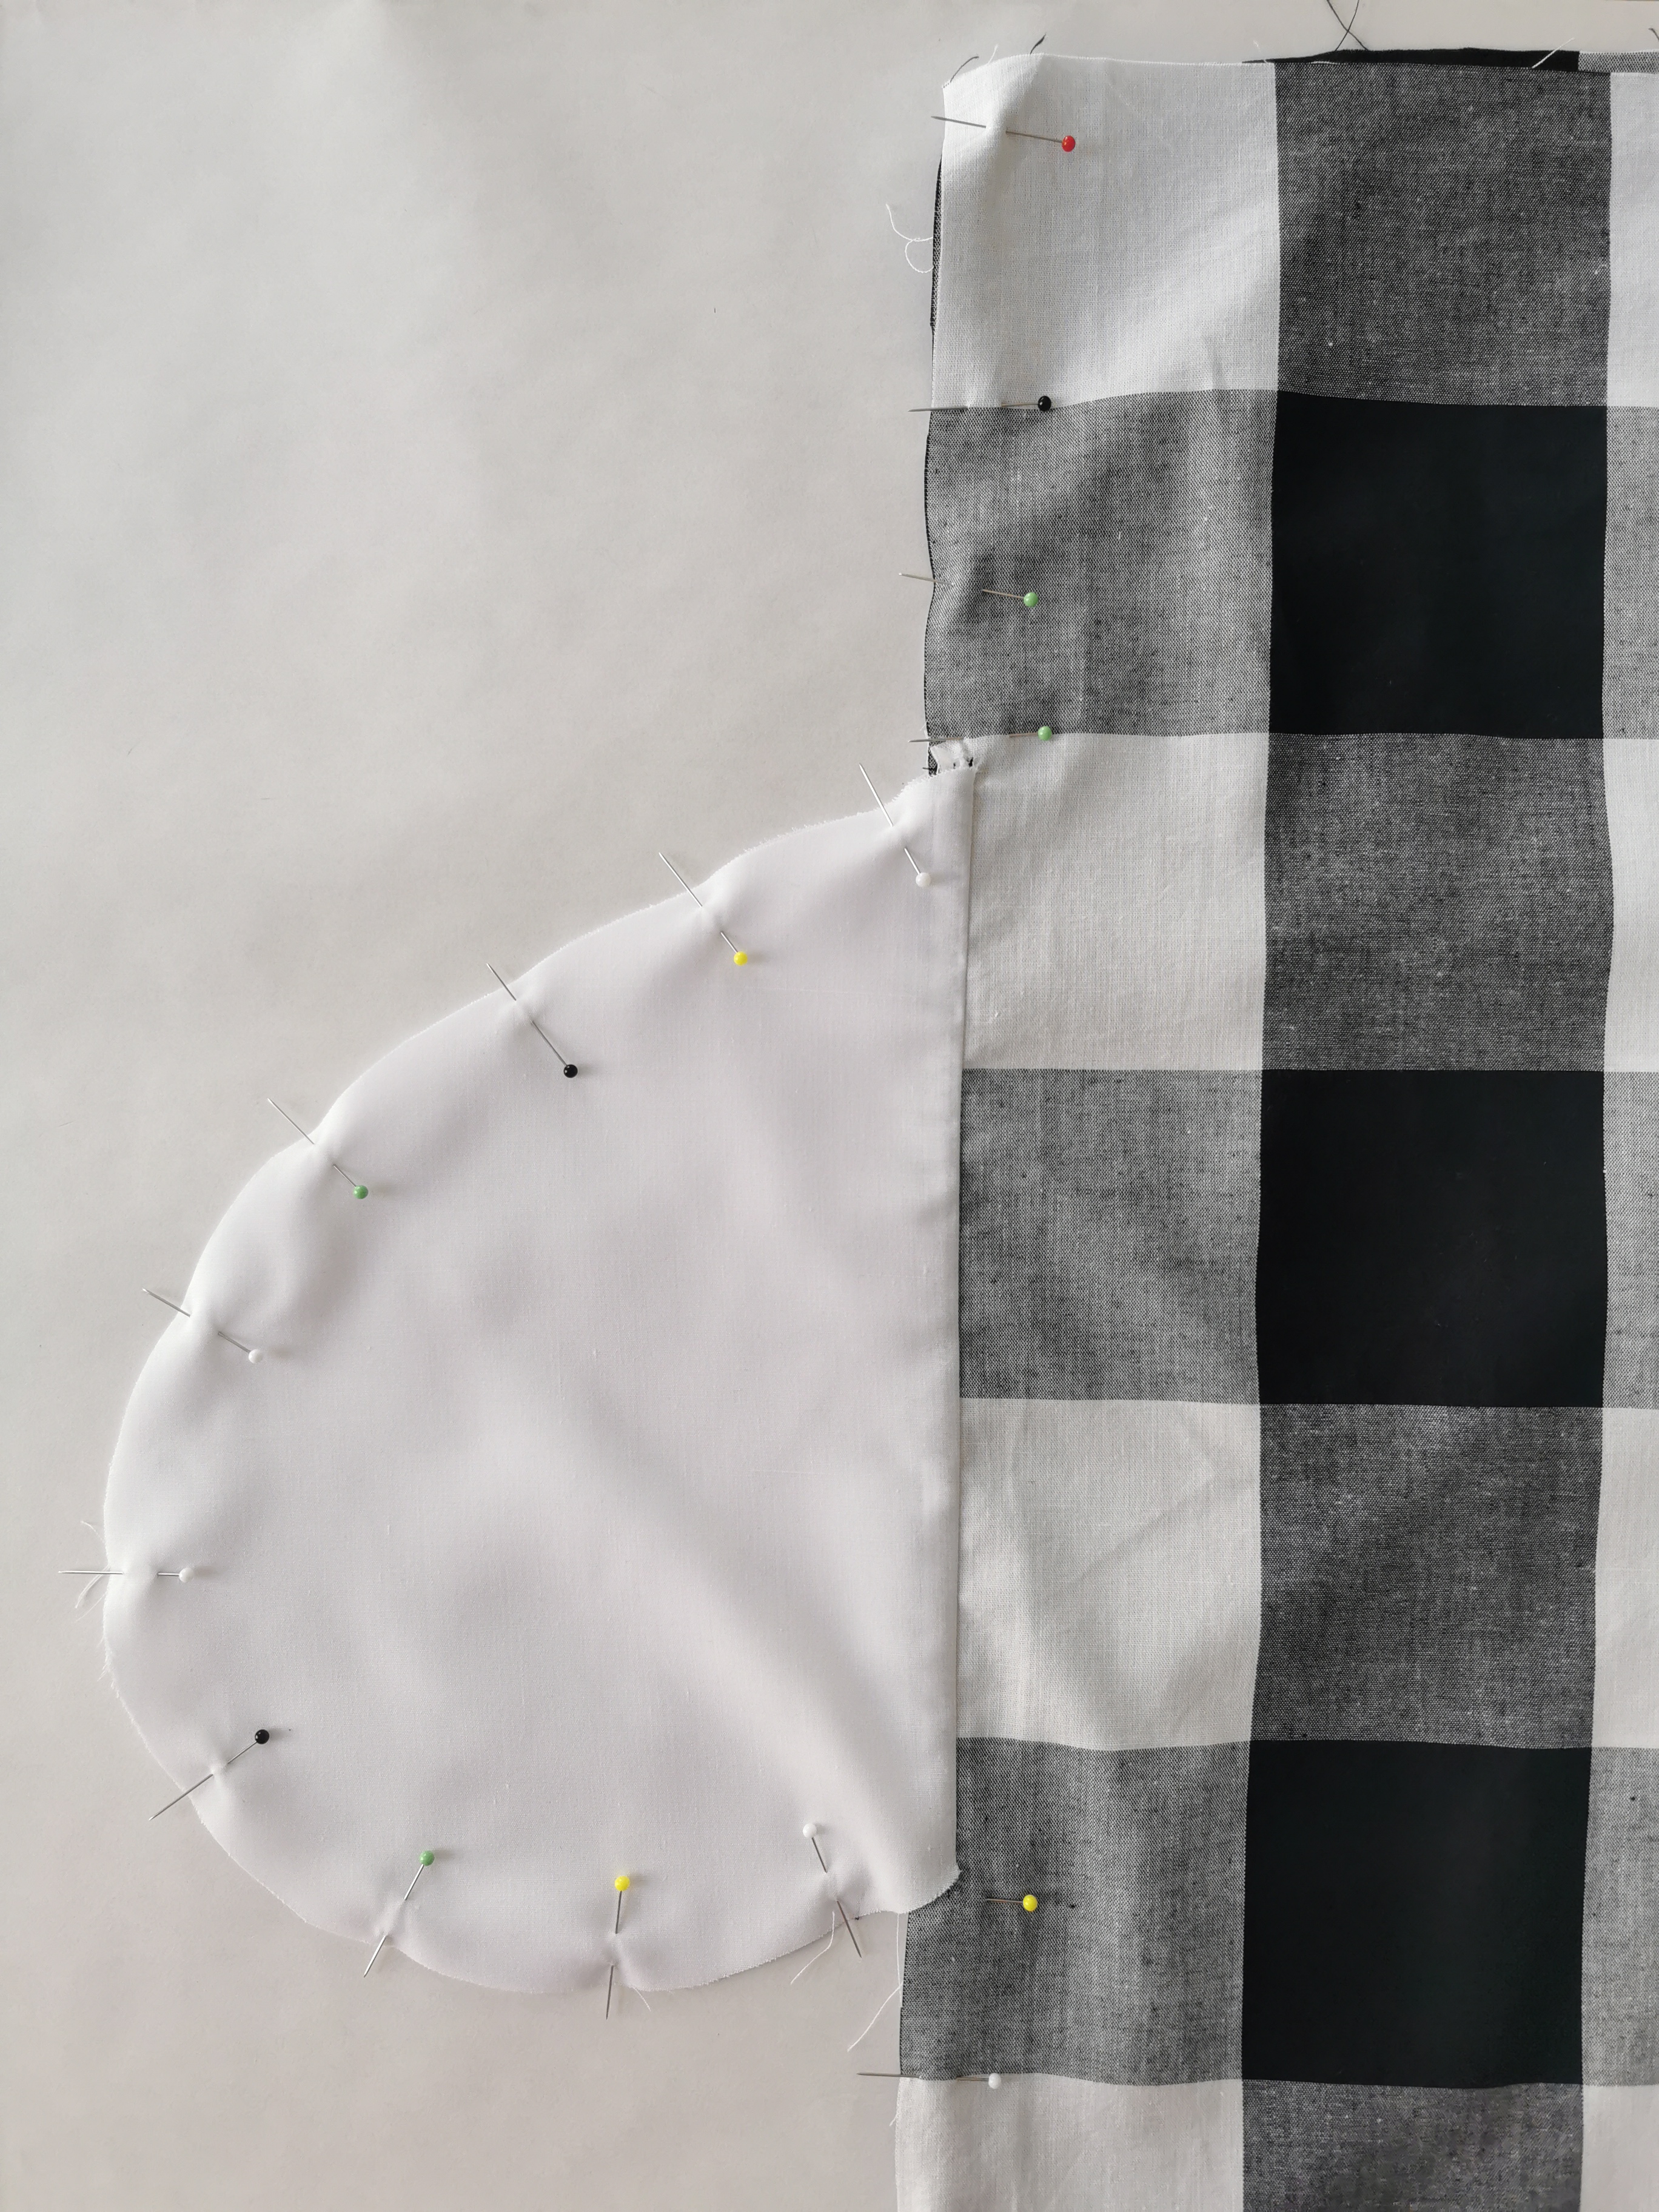
1.) Lay one pocket piece on each skirt front and back (at the notch you previously cut), right sides together.
Stitch in place with a 1cm seam allowance.
Press pocket bag outwards.

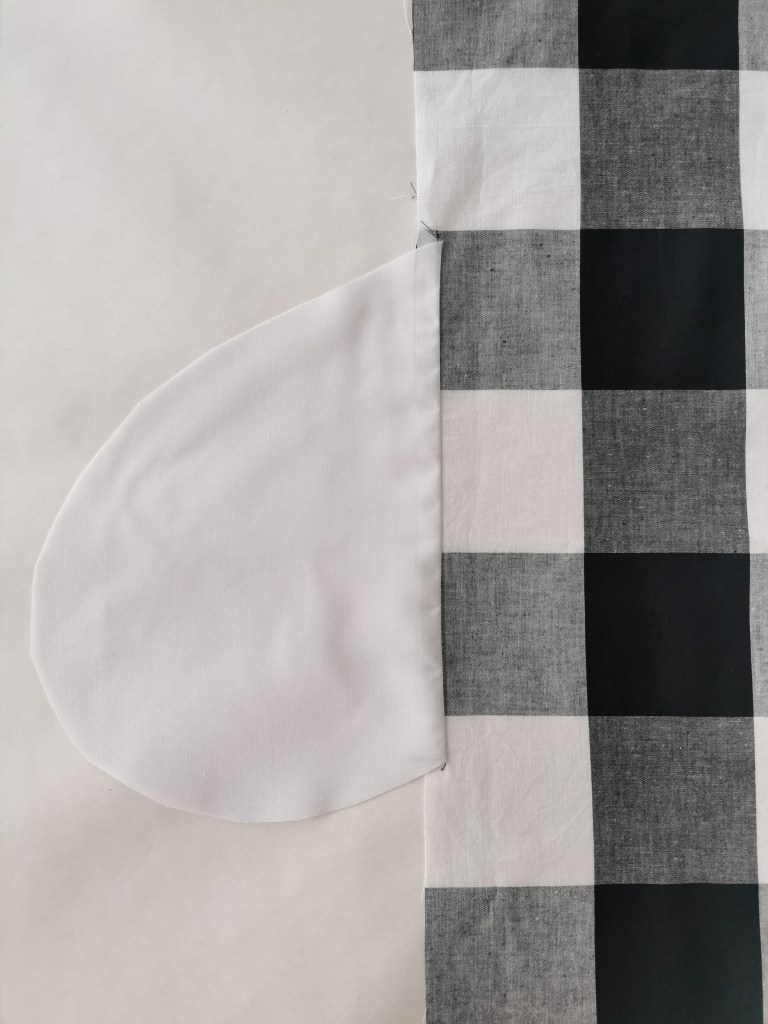
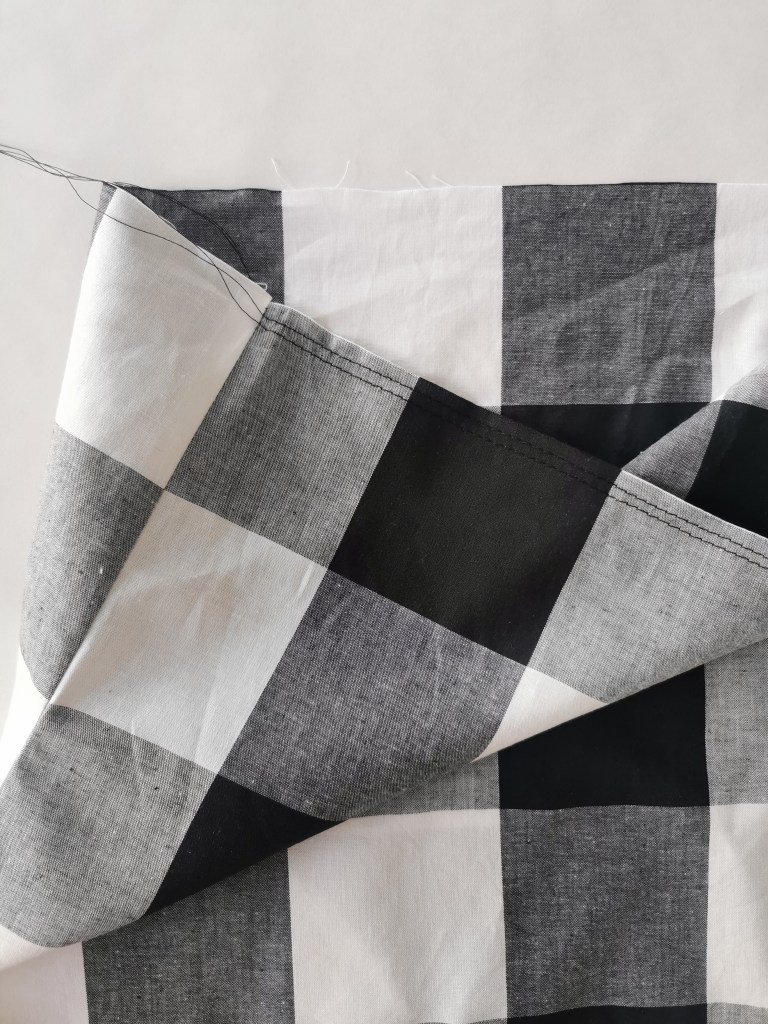
2.) Place the skirt front on the skirt back, right sides together. Pin and stitch side seams at 1.5cm, working all the way around the sides of the pockets. Finish seam allowances in your desired way (pinking shears/zigzag stitch/overlocker).
Alternatively, if you prefer French seams, sew wrong sides together first at 0.5cm, trim, turn through so the right sides are together, press, then sew again with a 1cm seam allowance.
Turn right way out and give the side seams a good press. You’ll have an enormous rectangle – your front and back joined at the sides.
3.) Sew two lines of gathering stitches along the front piece – only the front is gathered, not the back. Make sure to keep the gathering stitches within 1.2cm of the seam allowance. Leave long thread tails for gathering.

Construct the waistband
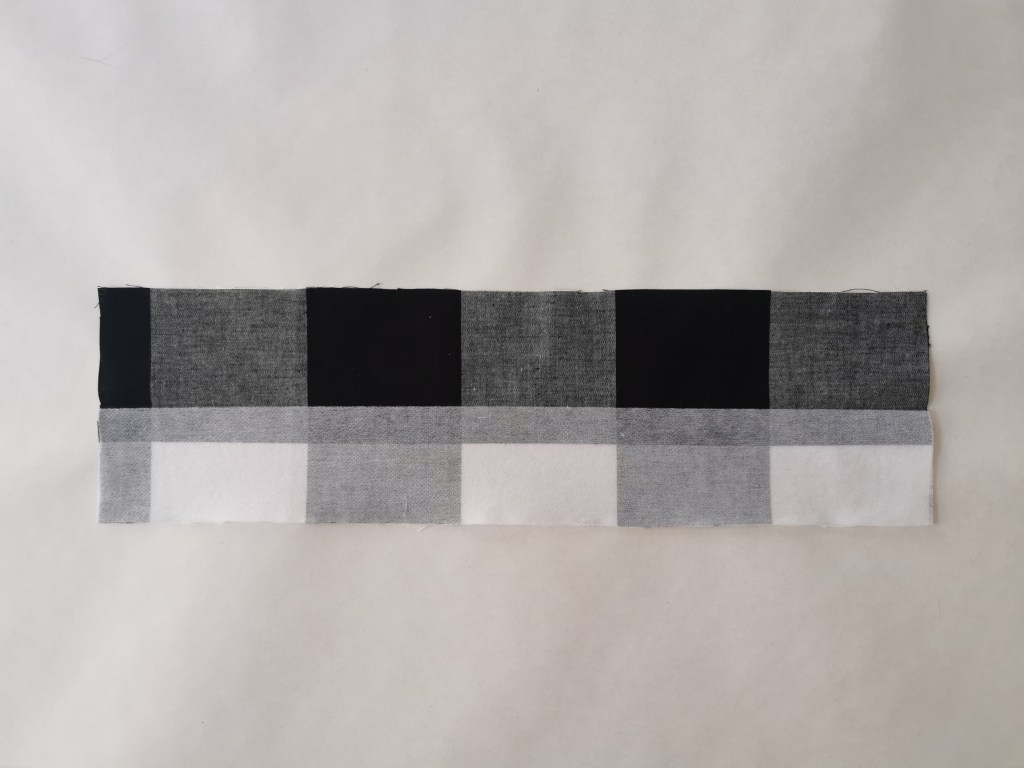
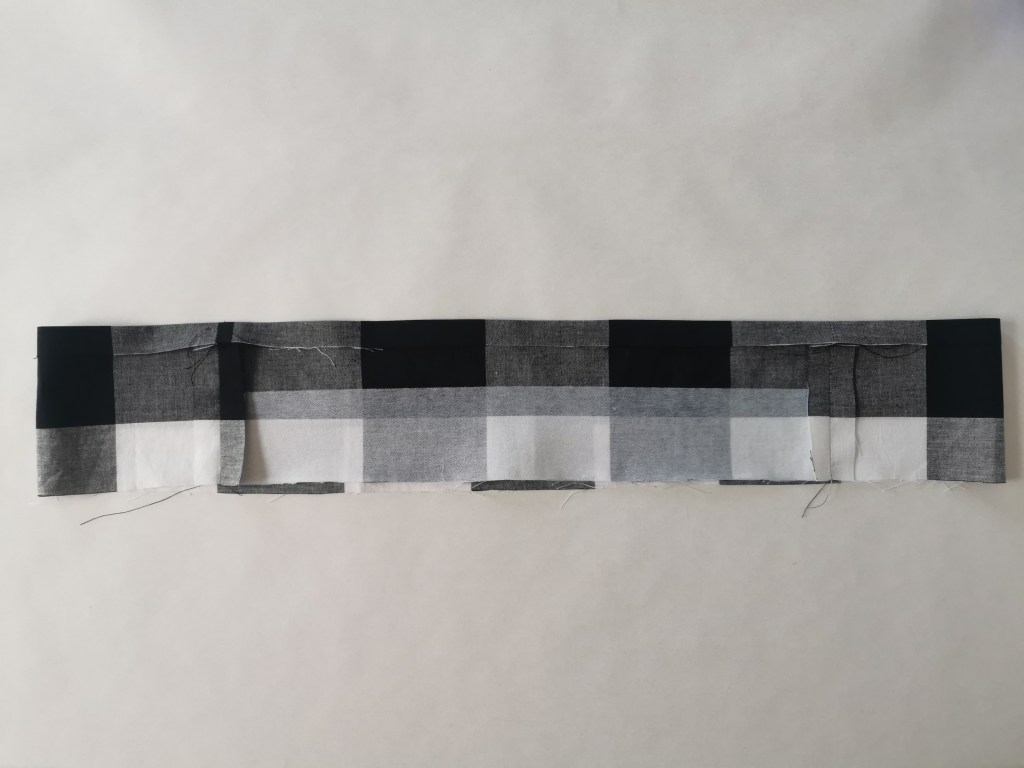
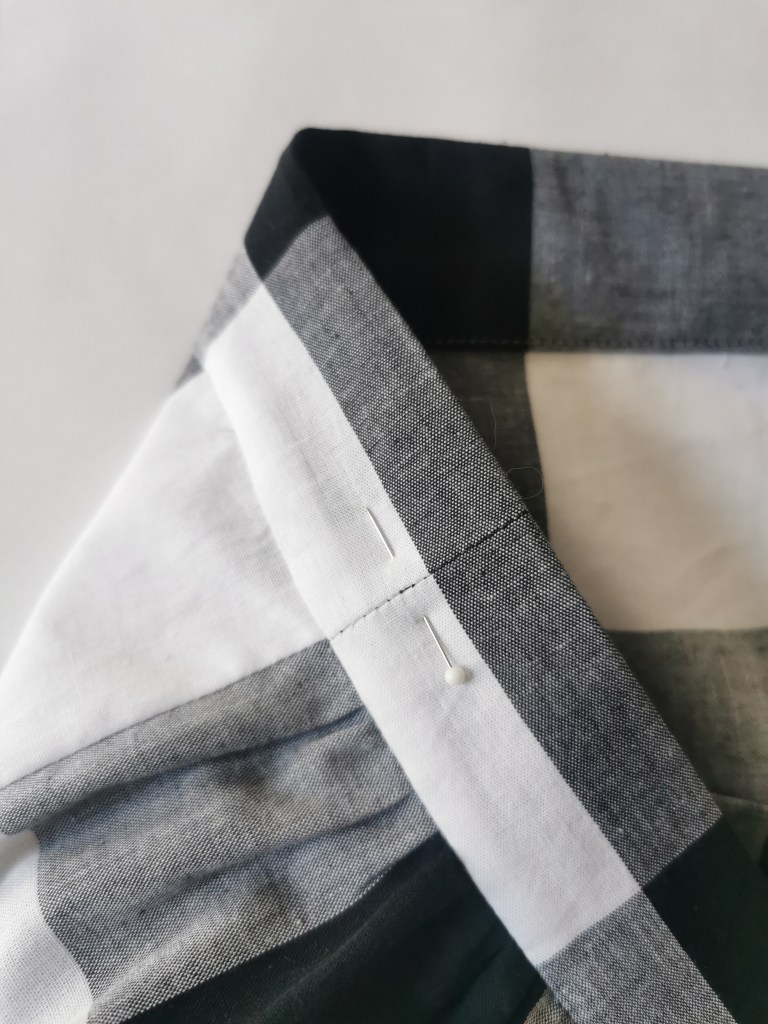
4.) Interface half the width of the front waistband piece (image A).
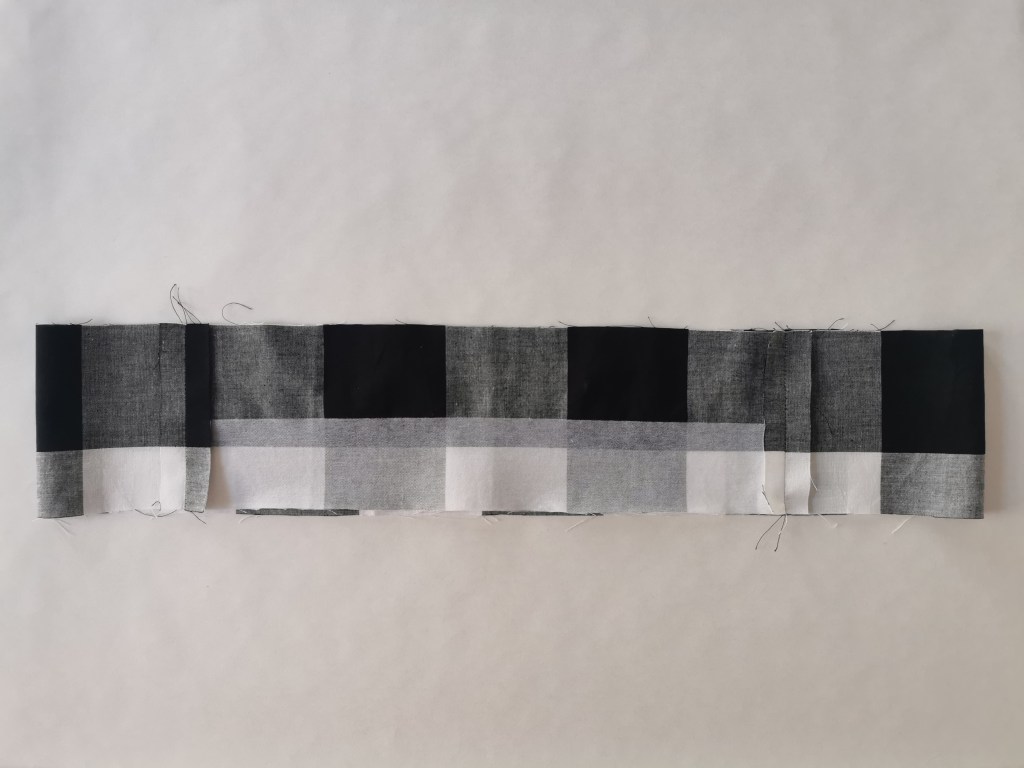
Stitch the short ends of the front and back waistbands with a 1.5cm seam allowance, right sides together. Press the seam allowances open (image B).
Press the long edge that has no interfacing under by 1.5cm (image C).
Join the waistband and skirt
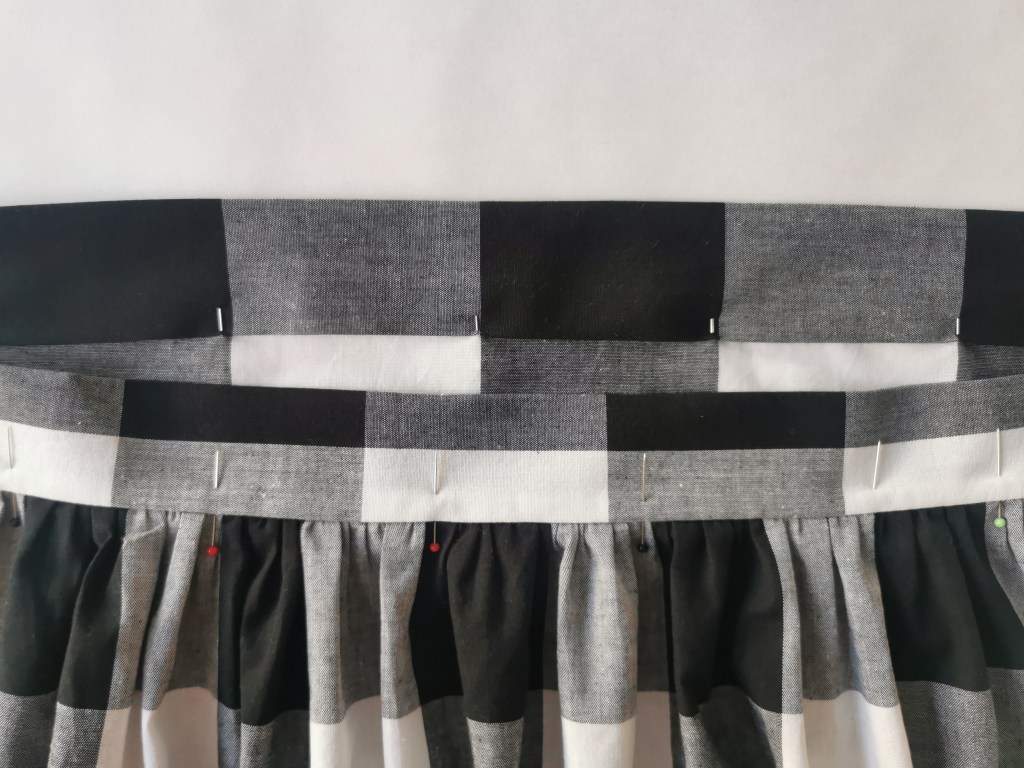
5.) Slip the waistband over and around the top of the skirt, right sides together. You want the side with the interfacing to be facing the top of the skirt.
Pull your gathering stitches to gather the skirt front to match the width of the front waistband. Pin in place.
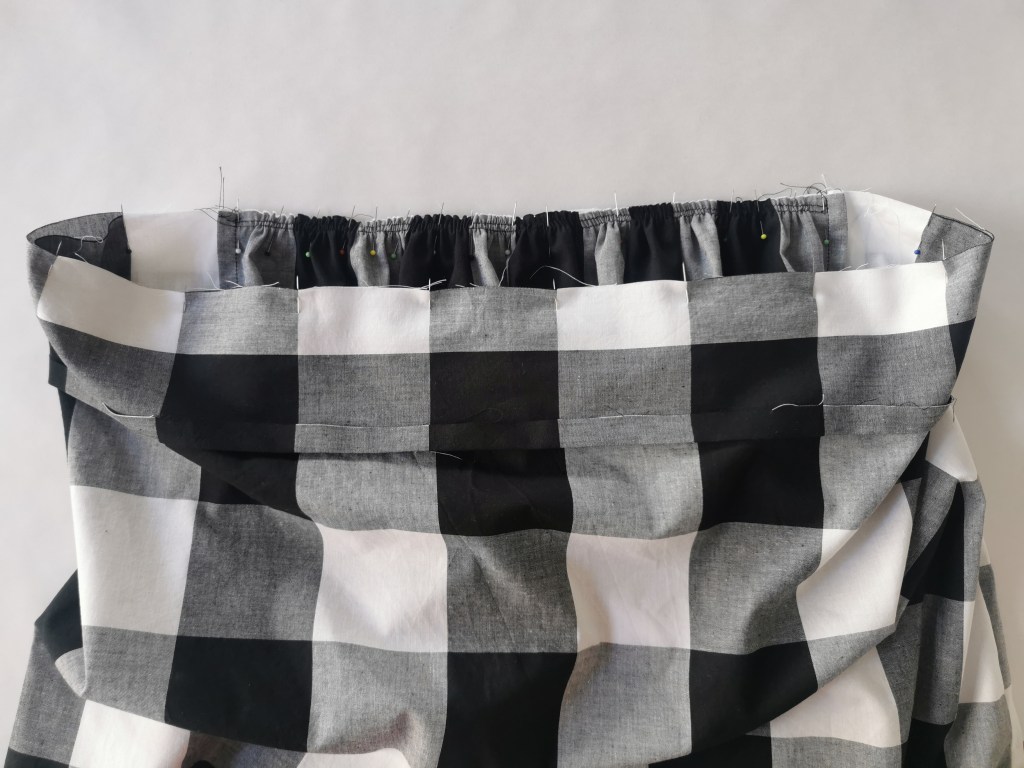
Stitch all the way round with a 1.5cm seam allowance.
6.) Trim the seam allowance to reduce bulk. Flip up the waistband and give it a good press so the seam allowance is going up into the waistband.
It’ll look a bit weird at this stage because the front piece will be the correct width but the back is really wide.
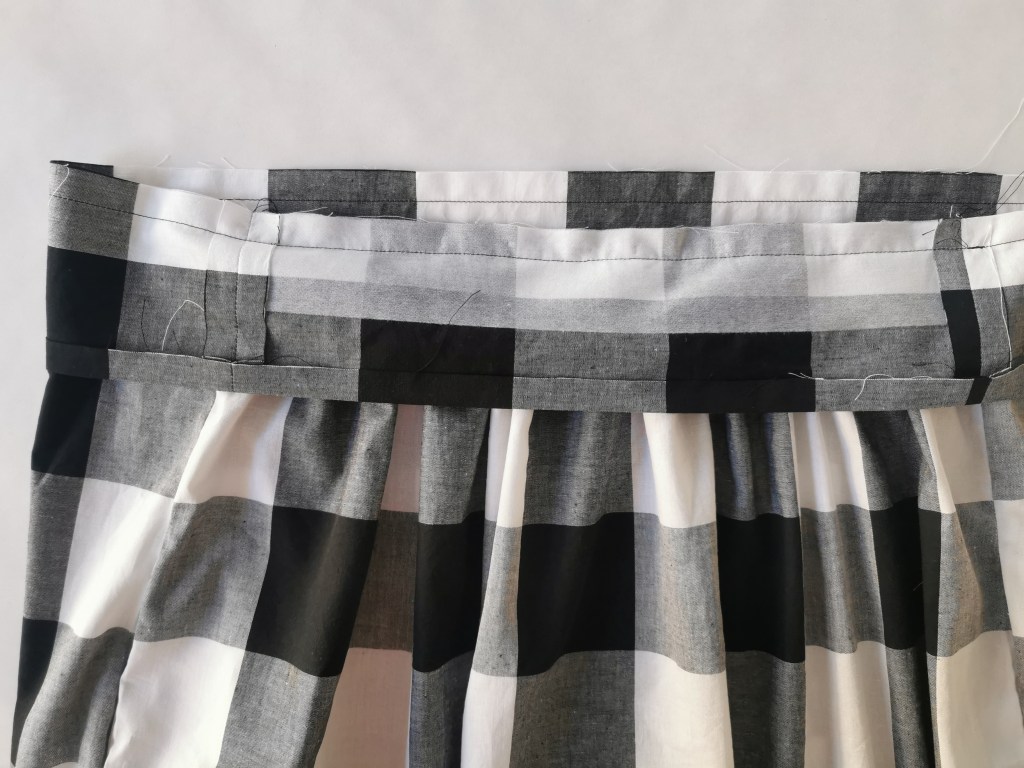
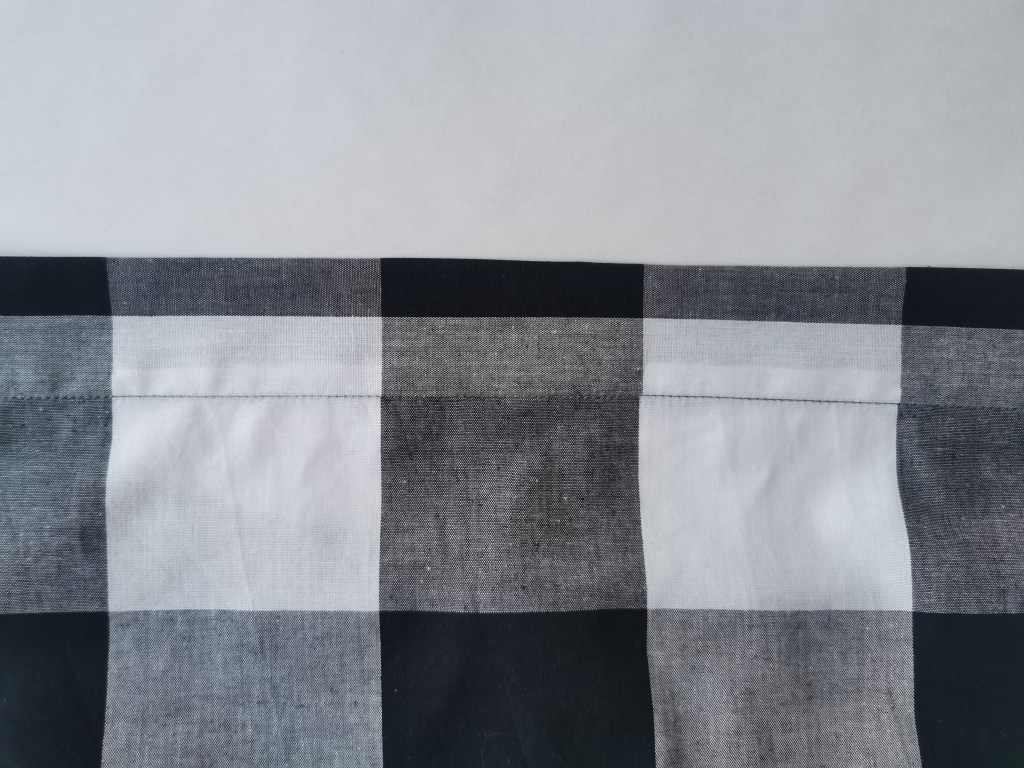
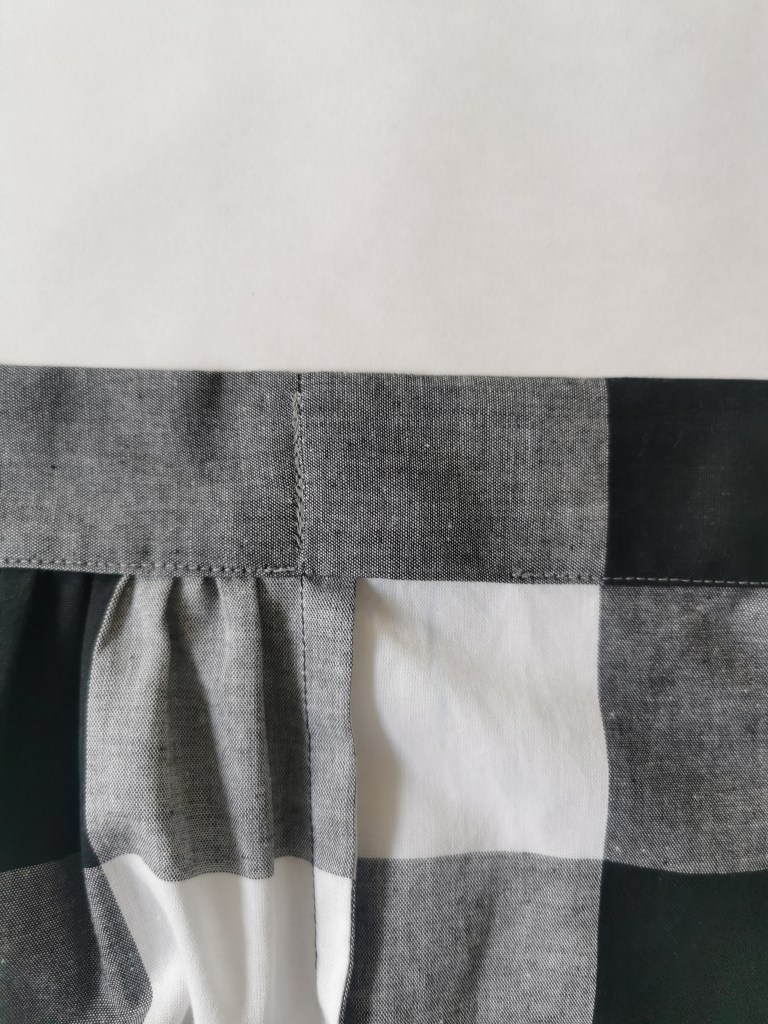
7.) Fold the waistband over in half, wrong sides together. Press so that the inside edge of the waistband goes about 2mm over the seam that joined the waistband to the skirt (that you sewed in step 5). Pin in place from the right side.
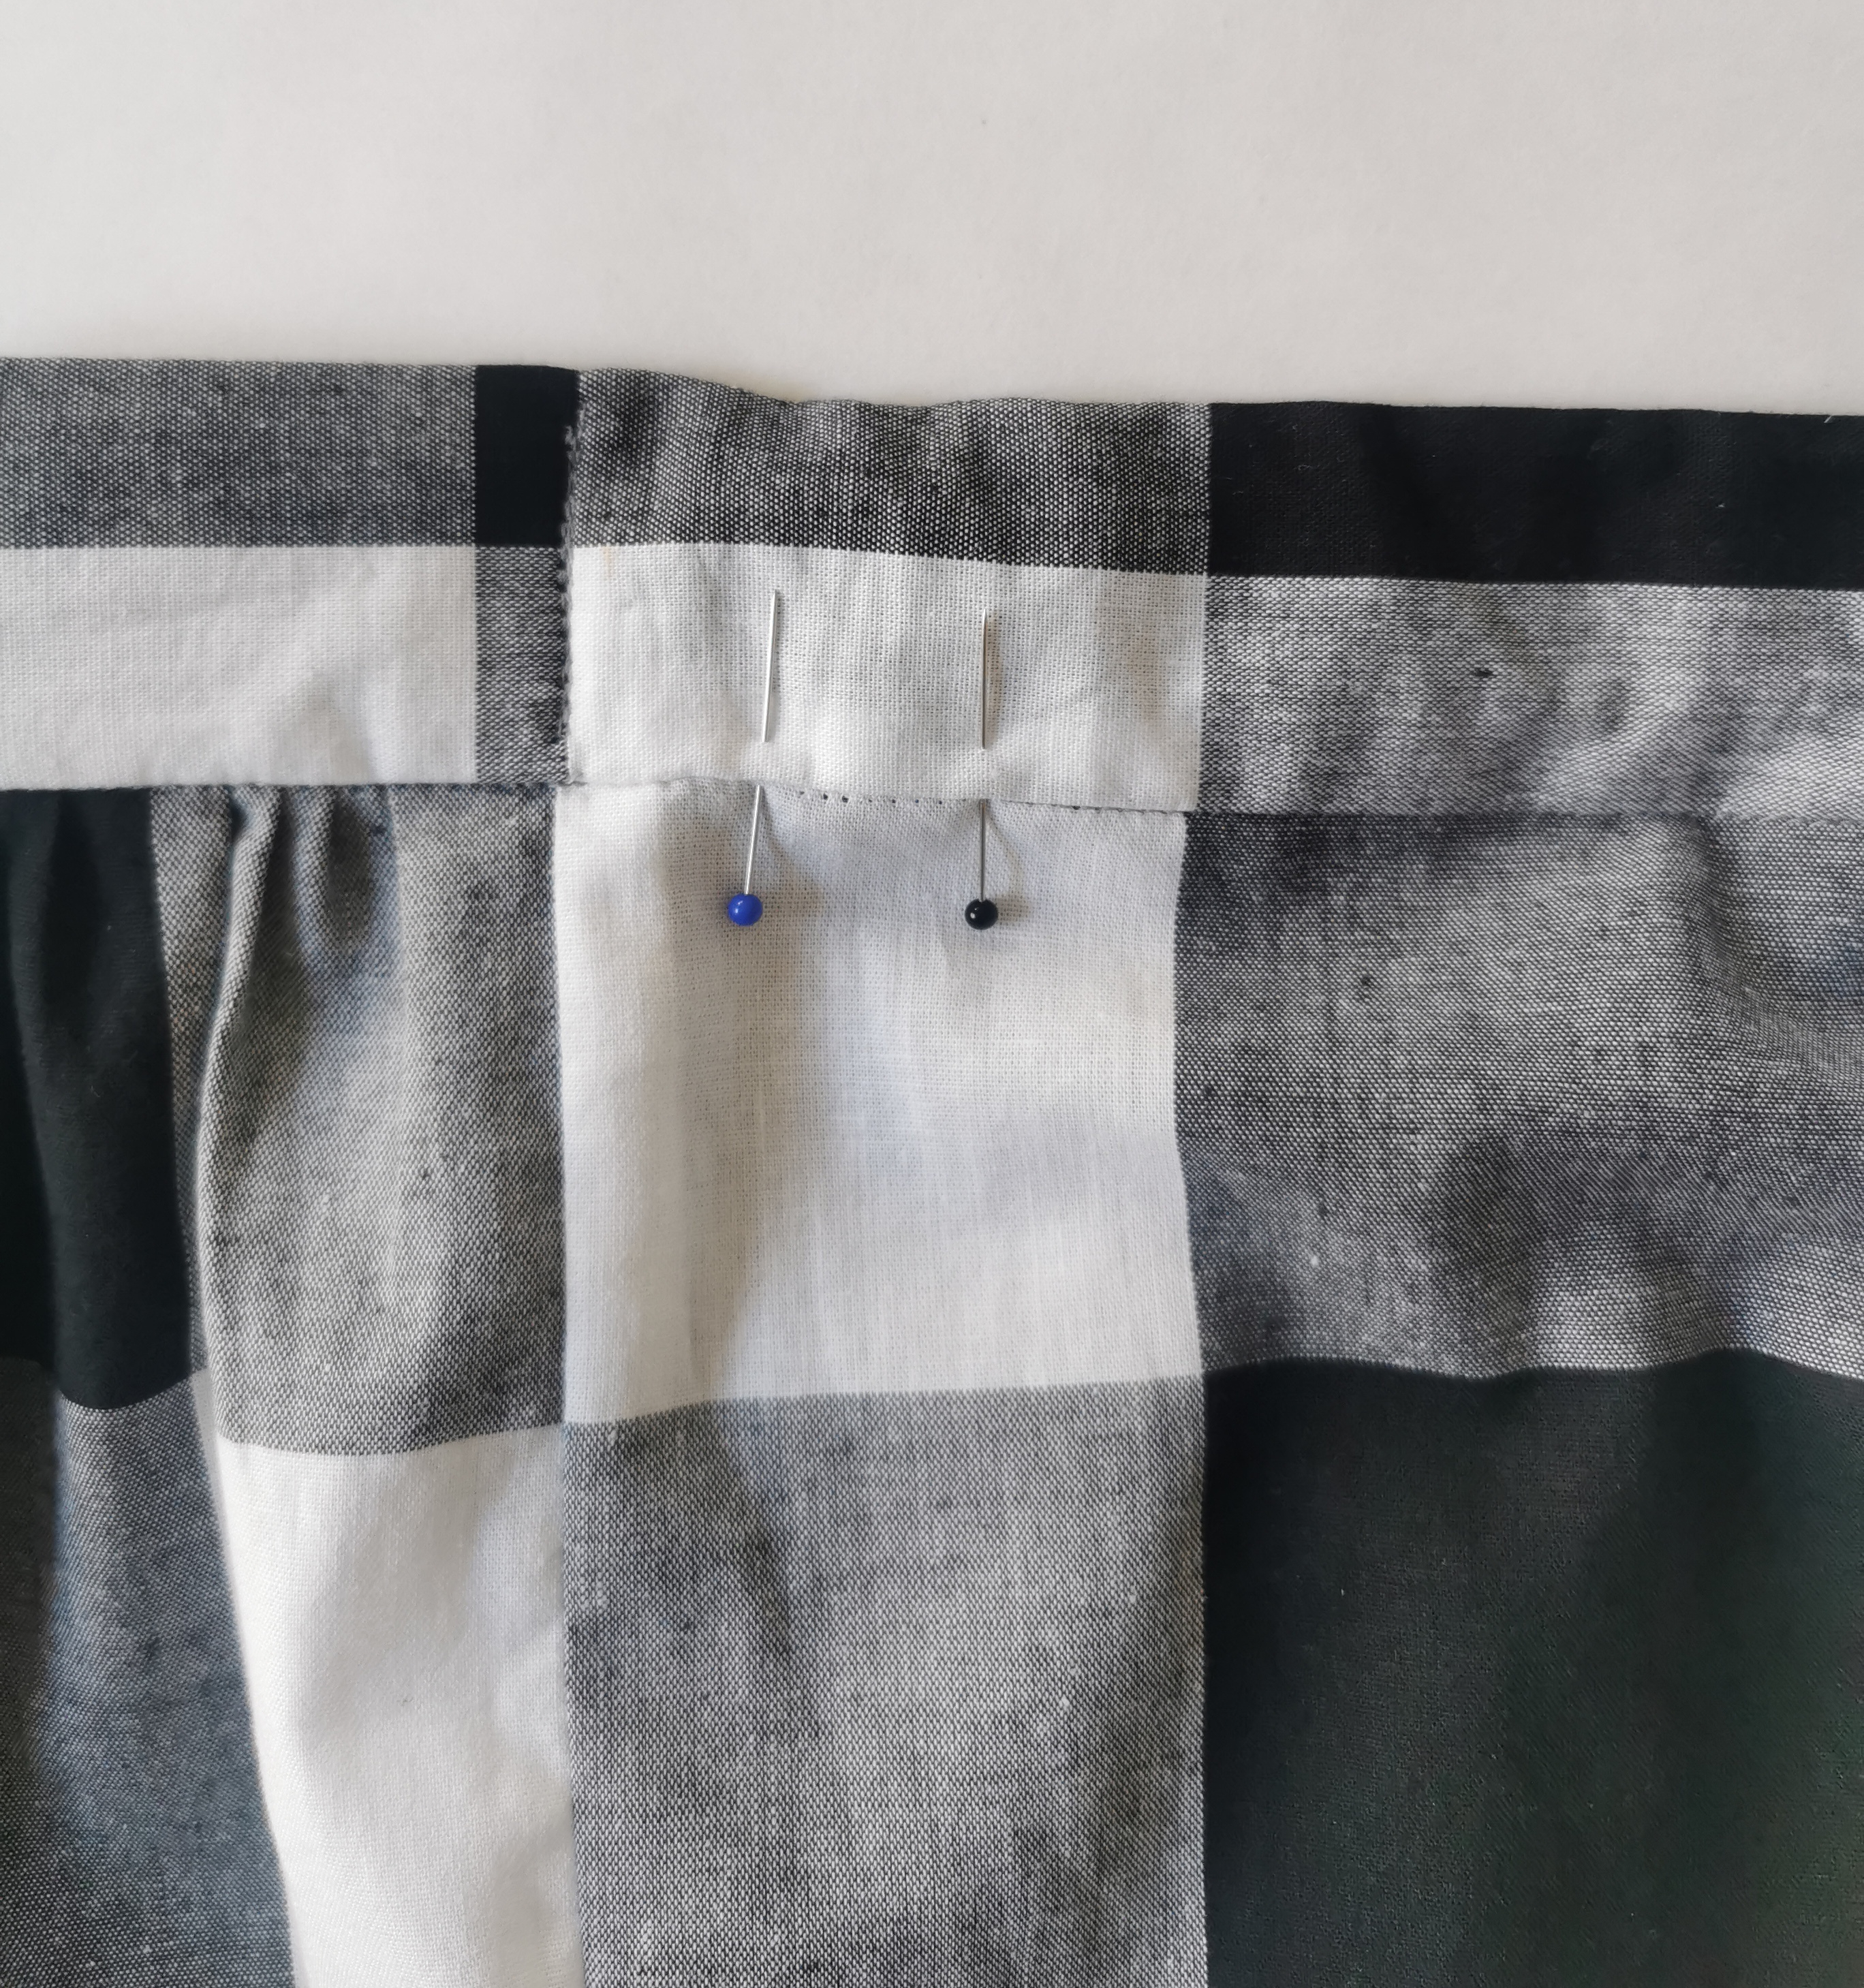
8.) Stitch in the ditch the whole way round, but leave a 4cm opening at both ends of the back piece – this will be to insert the elastic.

9.) Measure your elastic. Take half your waist measurement and subtract 10% e.g. for a 70cm waist, divide 70 by 2 = 35cm. 10% of 35 is 3.5, so subtract 3.5 from 35 = 31.5cm long elastic. If this gets a bit confusing, you can just hold the elastic up to your back and cut where it feels right. You might want to go a bit tighter or looser, whatever is right for you.
Put a safety pin in one end of the elastic and feed it through one of the 4cm gaps. Stop once the other end of the elastic is just about to go into the gap.
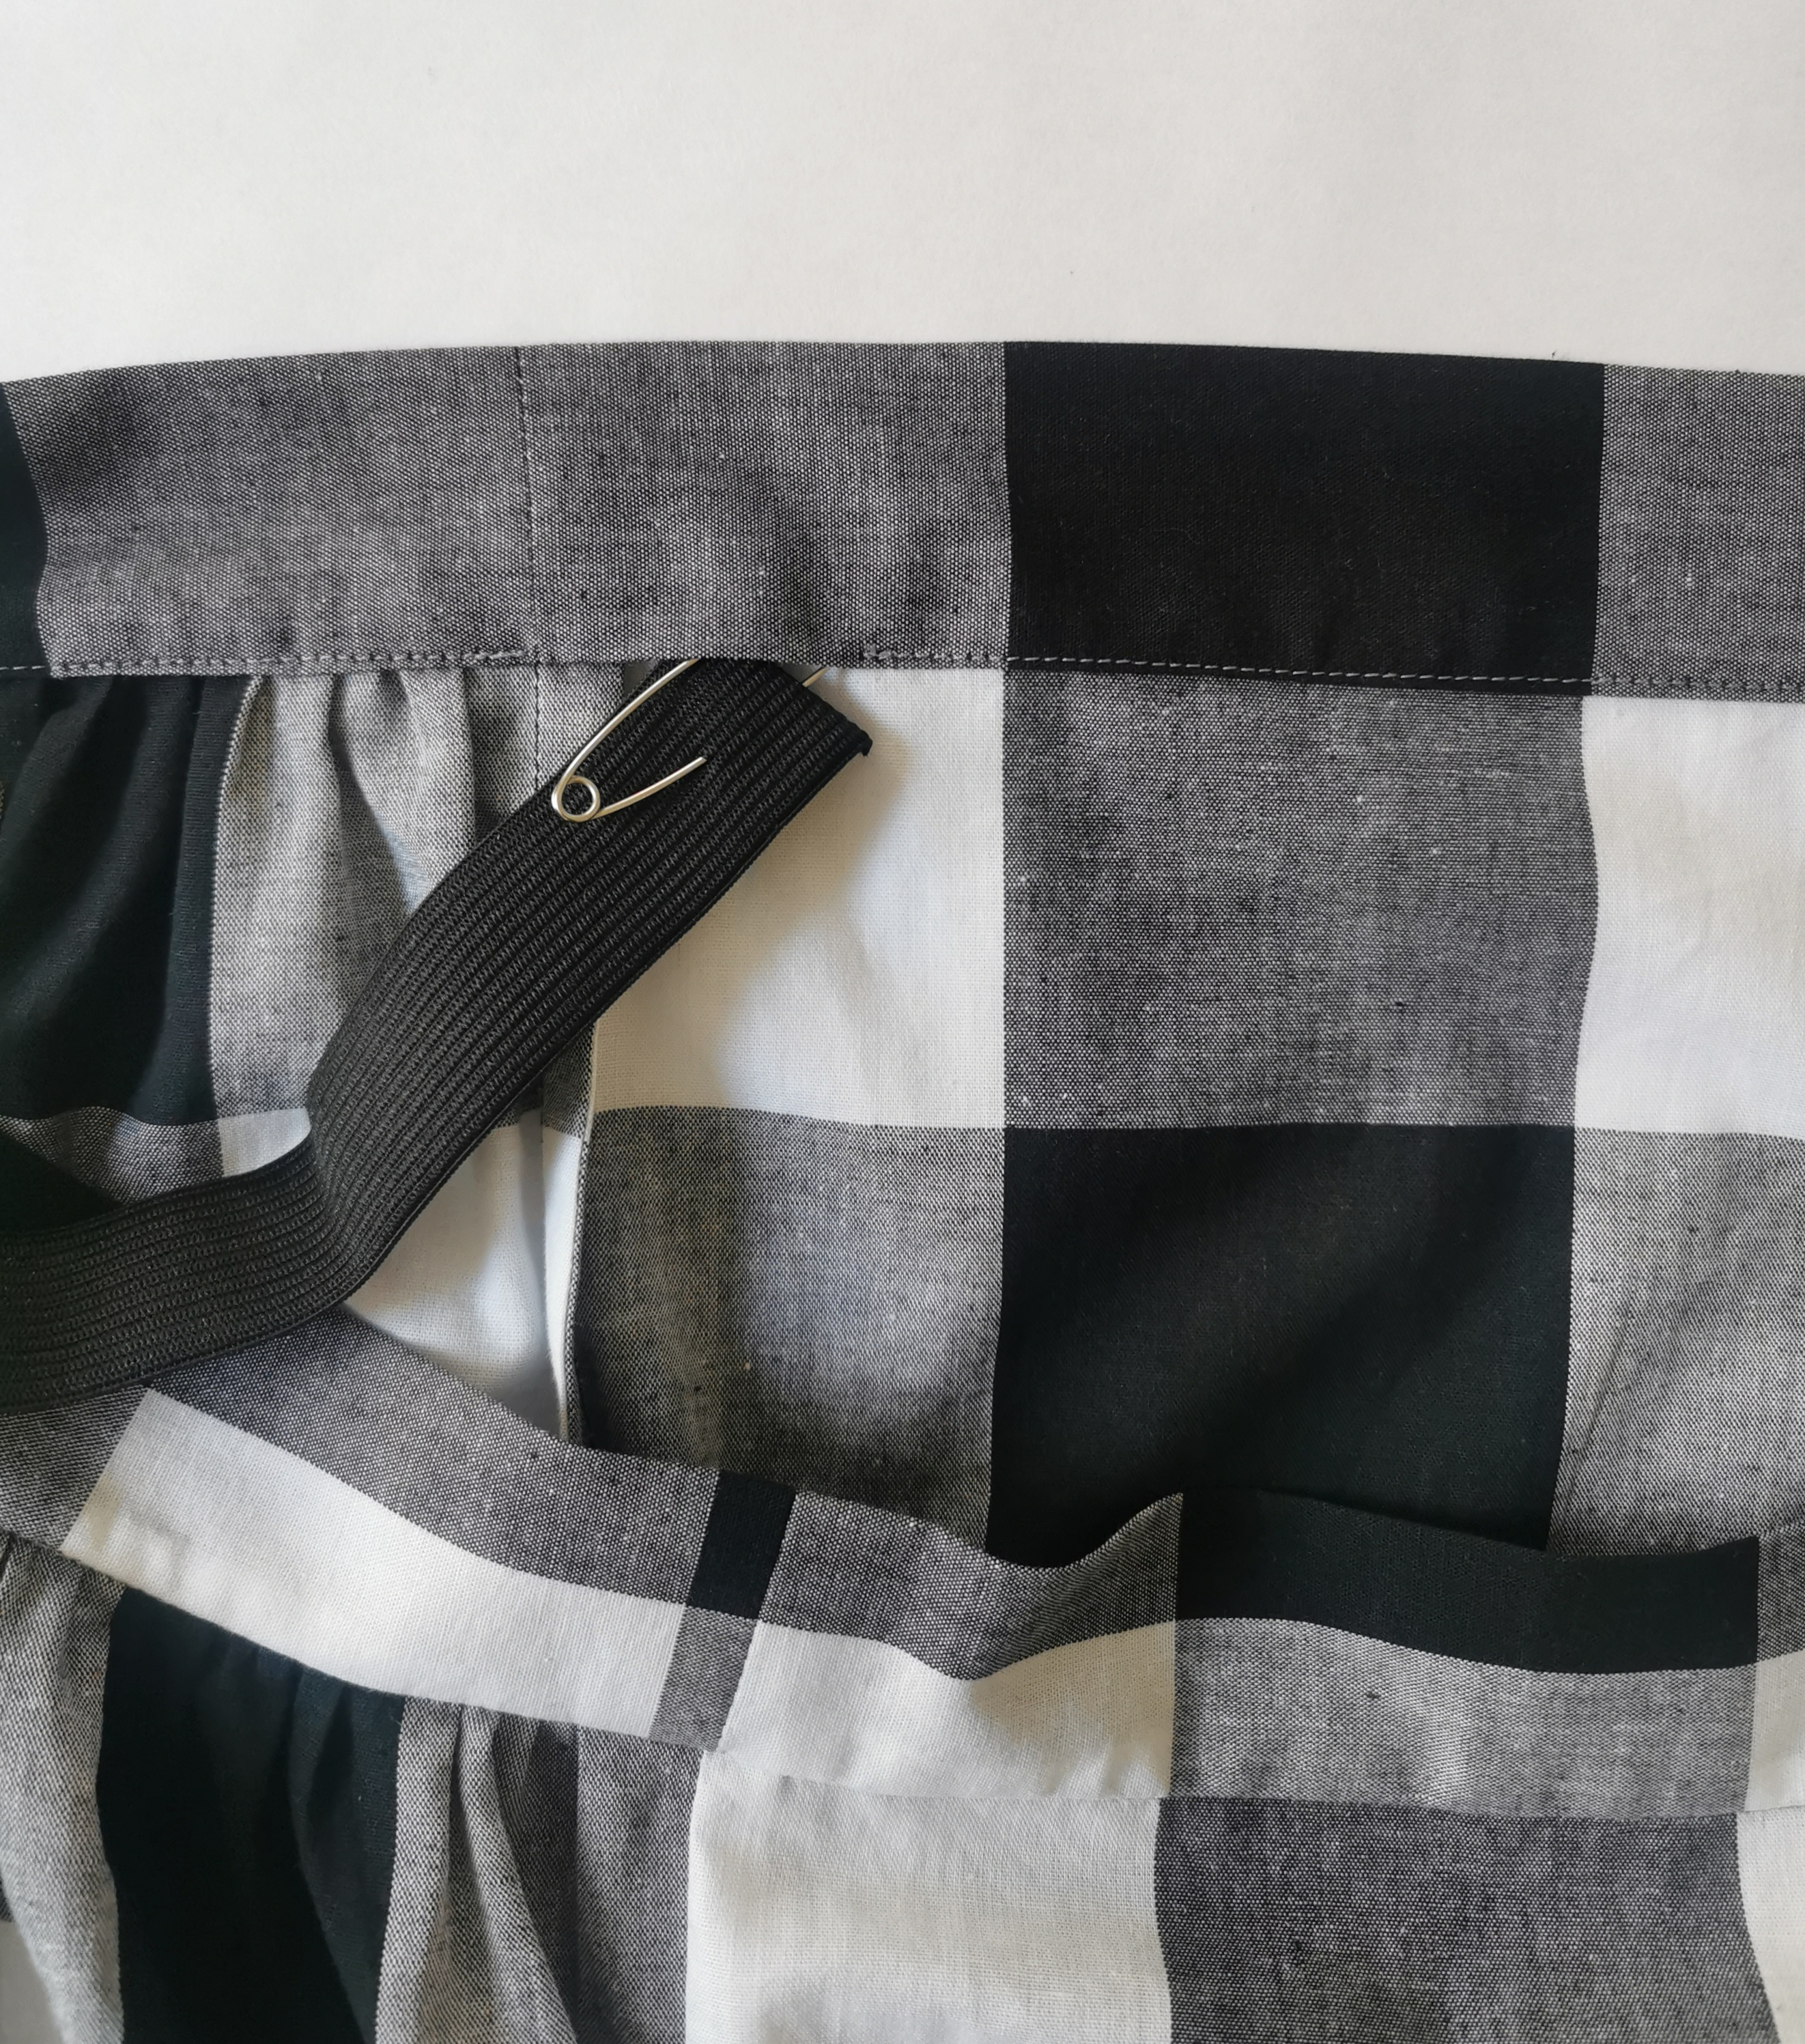
10.) Stop inserting the elastic when you reach the point that the whole elastic is in the waistband, but it’s still laying flat and hasn’t yet started to bunch together.
Place the end of the elastic that’s just going into the waistband (i.e. not the end with the safety pin in it) across the side seam of the waistband. This might take a bit of fiddling – put your finger into the 4cm gap and poke the elastic so it goes just across the side seam. Pin in place and stitch from the right side of the skirt. This is to hold this end of the elastic in place, so stitch over it a few times so it doesn’t ping out while you’re wearing the skirt!
11.) Now one end of the elastic is secured, continue feeding the end with the safety pin through the rest of the waistband until it pokes out of the 4cm gap at the other end of the waistband. Remove the safety pin and put the elastic back up into the waistband and across the side seam, like you did in step 10. Stitch in the ditch to hold this end of the elastic in place.
12.) Stitch in the ditch to close the 4cm gaps at each end.
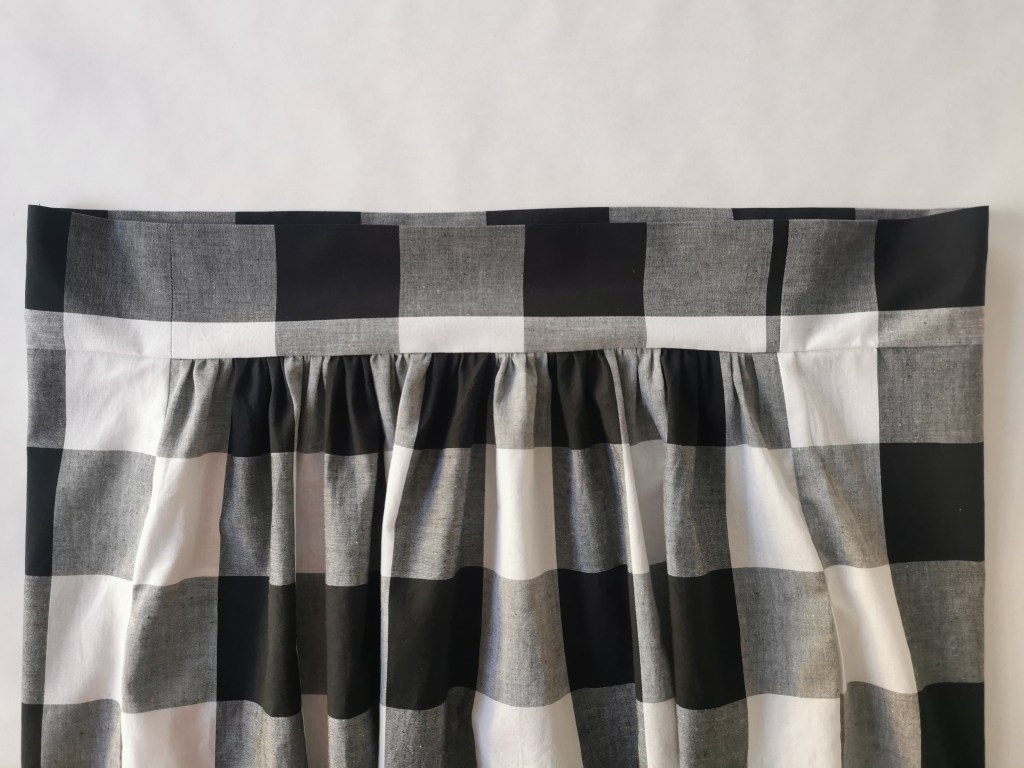
We have a skirt!

13.) Now to hem – try the skirt on and double check the length. Trim any excess or if you’re happy with the length, turn it up by 1cm, press, fold that over again by 1cm, then stitch in place 2mm from the edge.
Hooray, you’ve done it!


I hope you’ve enjoyed making this; it’s a brilliant skirt that’ll see you through the seasons, and now you’ve made it once, you can make it again in so many different types of fabric.
If you share any photos on Instagram, don’t forget to tag me @the.polka.dot.palace so I can see your lovely makes!

Thank you for sharing this. I’m new to sewing Ive made a few things but nothing with pockets yet and I’m going to give this a go
I’m not that great with instructions but these are fab. Very simple and pictures too very helpful. I will let you know how I get on.
LikeLike
That’s brilliant, thanks so much! I hope you find it all clear when it comes to sewing, please do let me know how it goes 😄
LikeLike
Hi Lucy,
I love this tutorial, I’m going to make it soon. I’m new to sewing. Maybe I missed it but, can you please let us know the amount of fabric we need to buy for this skirt?
Thank you,
Kristina
LikeLike
This looks great, I can’t wait to try it!
LikeLike
This is an excellent tutorial. I’m sure I could have McGyvered it on my own, but using your tutorial I can be sure that it will turn out beautifully.
LikeLike
Love this. How do I know the inches? I’m not familiar with centimeters? Thanks, Vicki
LikeLike
Love this pattern, can’t wait to try it out! Any thoughts on how cutting the waistband on the bias might affect the pattern?
LikeLike