Almost without realising it, I’ve started adding little neckties whenever I wear shirts (and that’s quite often). They just create the perfect finishing touch. I shared a photo of myself wearing one on Instagram and received loads of questions about it, so here’s a quick tutorial so you can sew your own. I’ve given three options so you can create the shape that’s right for you.

This is a super simple project and a great way to use up any offcuts, especially if you end up with long skinny bits next to the selvedge. Here are the measurements for each option, and below you’ll find the instructions for sewing, which is the same for all options.


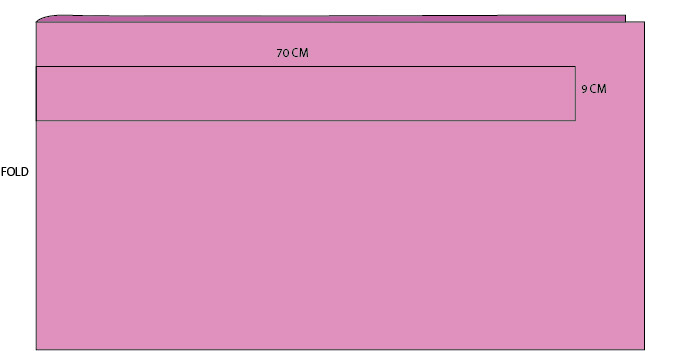
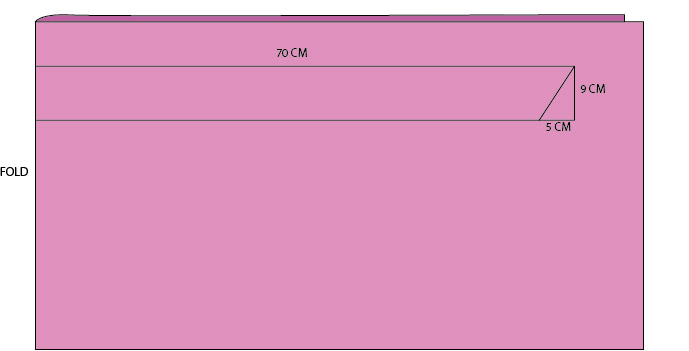
Option A: 70cm long (cut on the fold) x 9cm wide
Option B: 90cm long (cut on the fold) x 9cm wide
Option C: 72cm long (cut on the fold) x 8.5cm at its narrowest side, 16.5cm at its widest (more details given below).
MEASURE
If you think you’ll make a few of these you could cut templates out of paper to save measuring each time! For versions A and B, measure a long rectangle to the measurements given above.
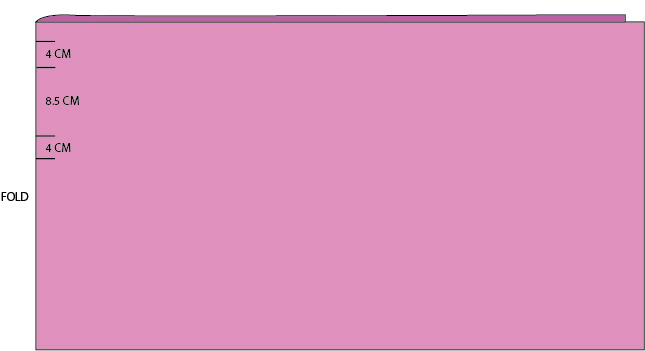
Version C
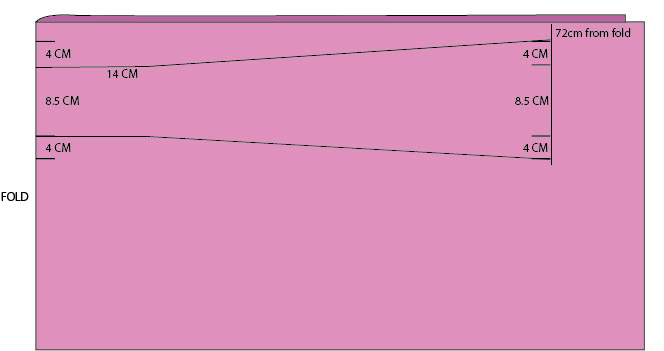
For version C, you need to allow space for the tie to flare out. This may seem like a bit of a faff, but it’s so that the section going round your neck doesn’t increase in width, but the ‘tie’ bit of the necktie does!
Using chalk, draw a mark near the top of the folded fabric then measure down by 4cm and draw another mark. Measure down another 8.5cm and mark, then 4cm again and mark.
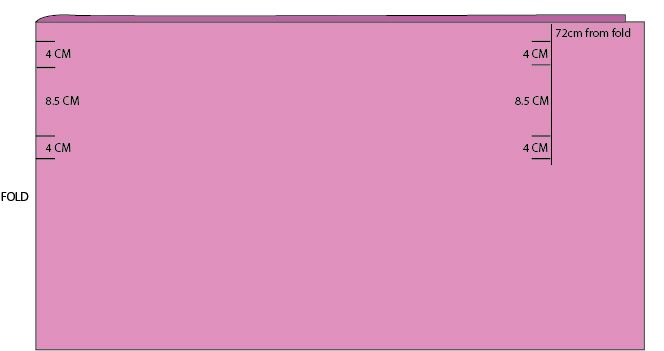
Repeat these markings 72cm from the fold. This will be the end of the tie.
Measure out horizontally for 14cm from the lines either side of the 8.5cm section. Then flare out and join to the outer edges of the 4cm sections you marked.
All versions
At the end of the rectangle (for all versions), measure across from the lower corner by about 5cm and angle up to the top corner. This is to create a pointed end. You can go as subtle or as exaggerated as you like by increasing the amount you measure out by. I went with 5cm for ties A and B, and 7cm for C.
SEW
Cut one then use that as a template to cut another, so you have one pair. Lay one on top of the other, right sides together and use a 1cm seam allowance to stitch all the way round. Leave a gap of about 8cm somewhere around the middle.
Trim the corners and the seam allowance, then turn the whole shape through the gap. Use a point turner or a blunt knife to get those corners nice and pointy. Give it a good press then slip stitch the gap closed. (Having this gap in the middle of the tie will mean your hand stitching is hidden under your shirt collar!)
That’s it! Fancy giving another tie a go??? I think for my next one I’m going to combine Versions B and C to make a super wide, super long version…


Really appreciate this tutorial, thanks for taking the time to share Alice. I will certainly be making some when I do my Thea Blouse soon.
LikeLike