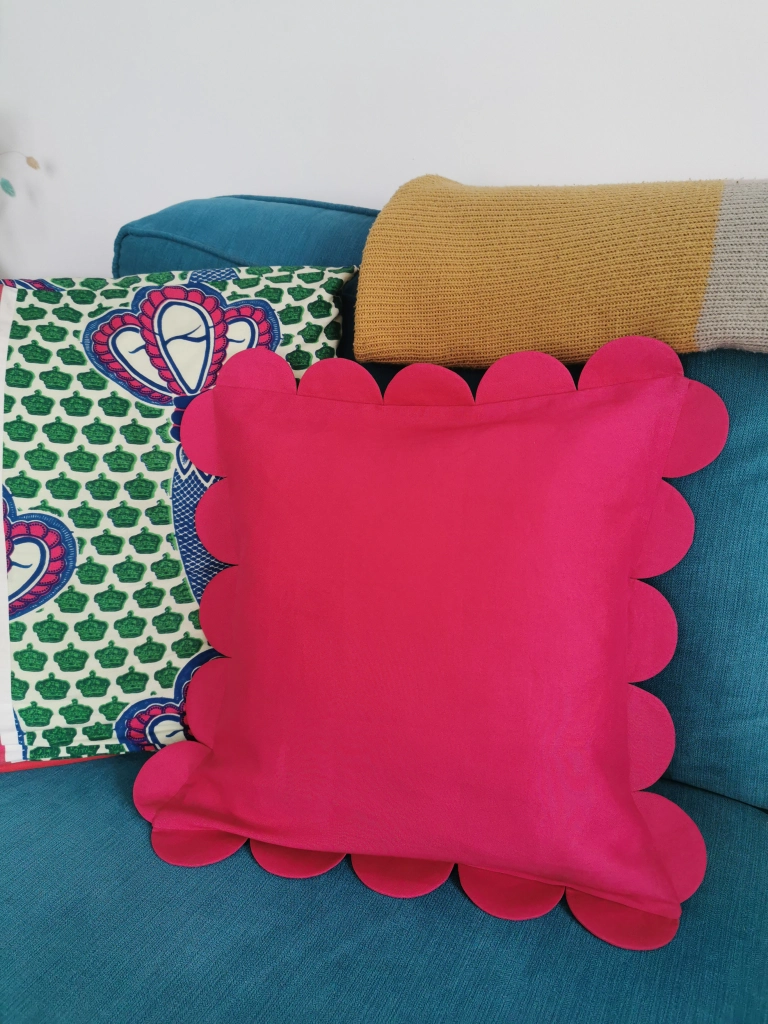
This cushion is the perfect little refresh for your sofa. I love using bold prints for my homeware, but this works just as well in a plain fabric to let the shape do the talking. Also, as each scallop piece is made individually, this is a great scrap buster and you could clash a number of fabrics.
You may have seen other tutorials that show how to do a scallop edge on e.g. a skirt hem, and they will generally be a nice curve, but I wanted proper semi circles on this. Because of this, each ‘scallop’ is made individually. This may seem like a mammoth task but trust me, it’s a lovely methodical and easy project.
This is drafted for a 40cm cushion. If you have a cushion pad that is a different size, adjust the pieces accordingly. If you need any help with this just drop me a message as the maths can get a bit confusing! So let’s get sewing…
1) Cut one square 42cm x 42cm. This will be your cushion front.
Cut two rectangles 42cm wide x 28cm high. These will be the back pieces that create an envelope opening.
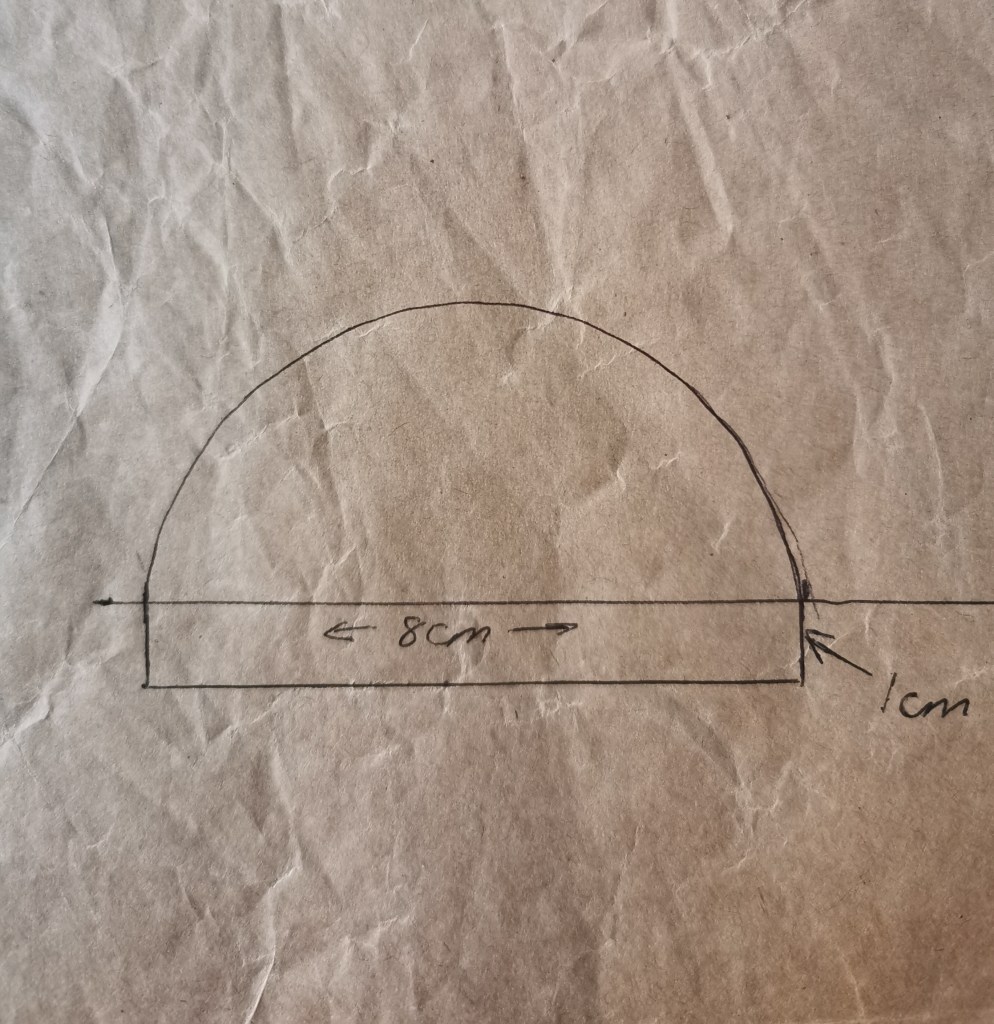
2) On a bit of paper, draw a semi circle with a diameter of 8cm.
If you don’t have a compass (or a glass with an 8cm diameter to draw round!), you can use this template, just make sure to print ‘actual size’ (a lot of printers default to a different scale).

3) Add 1cm to the base of the semi circle – this will be to attach the scallop to the cushion.
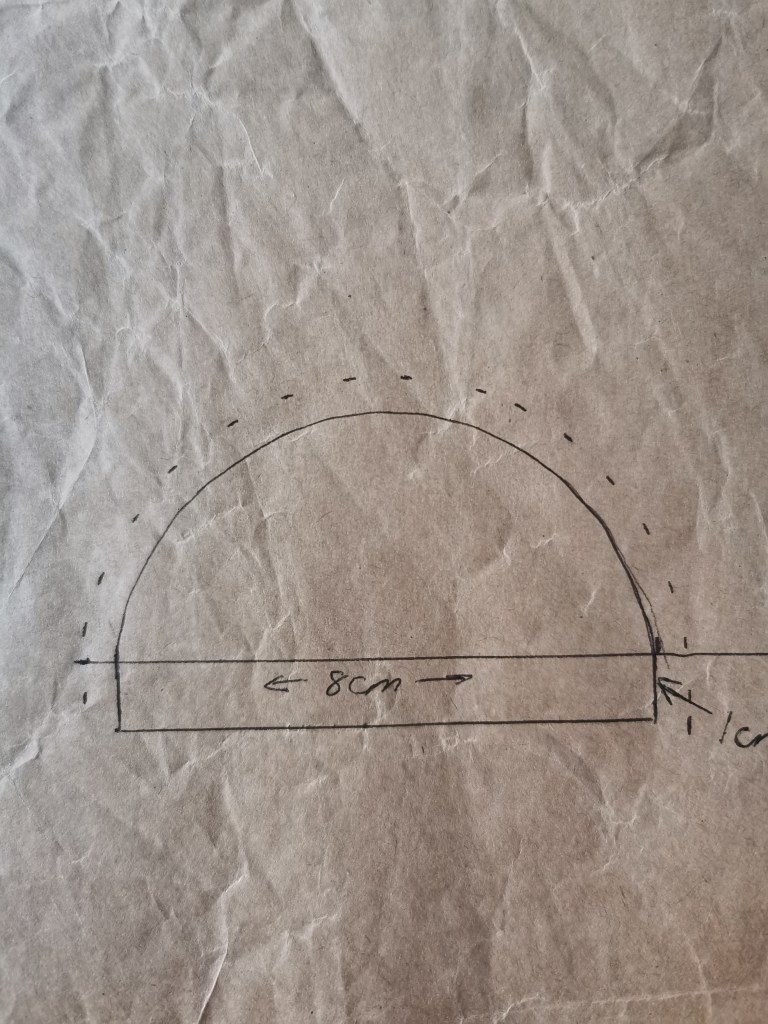
4) Add a 0.5cm seam allowance around the edge of the semi circle. To do this, measure out 0.5cm at regular intervals (pic A) and join the gaps to create a gentle curve that echoes that of your original shape (pic B). Note: just add 0.5cm around the curved edge and the sides of the 1cm that you added in step 3, but not the base. This is your pattern piece (pic C).


5) Block fuse a section of your fabric with iron-on interfacing, then cut 20 pairs. This is to create 5 scallops for each of the 4 edges of the cushion.
Make sure to cut right sides together, and as you remove the pattern piece, pop two pins in straight away to hold the pieces together. Then they’re ready to sew and you’re not sitting there trying to pair up 40 random scallop shapes!
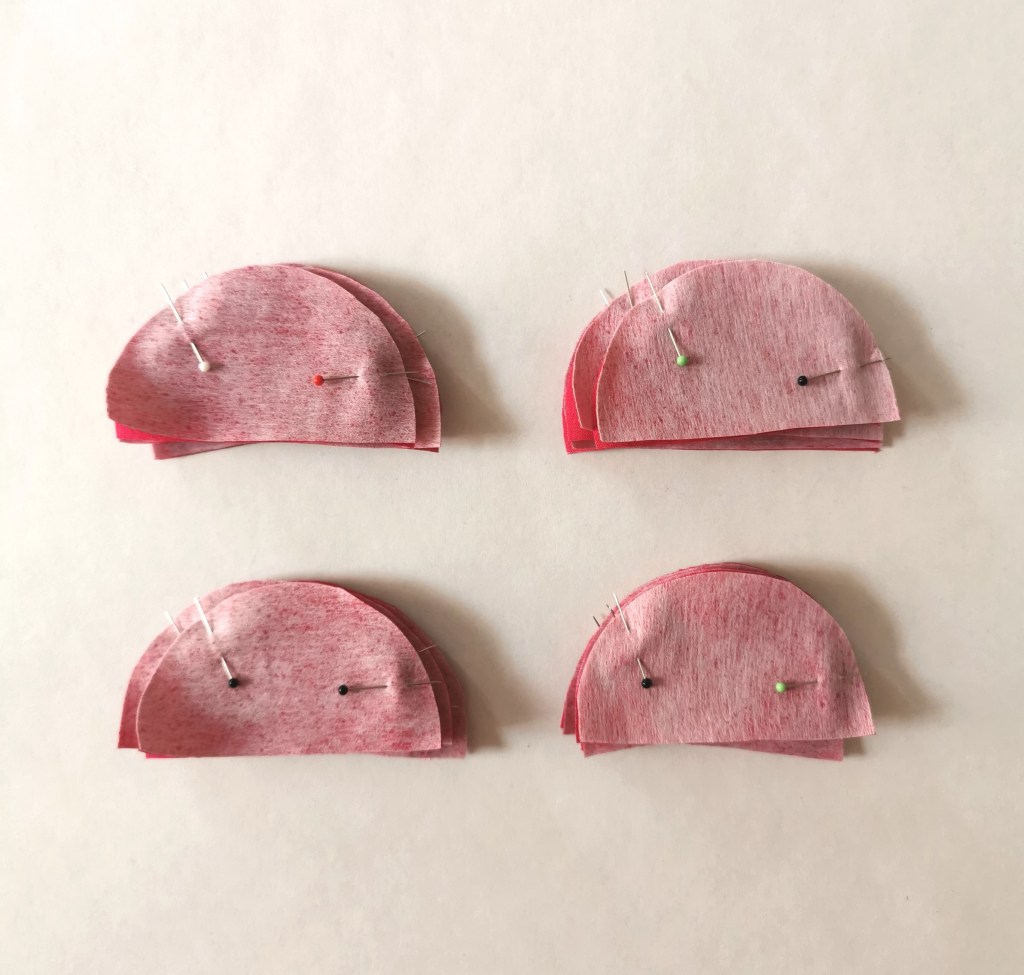
Tip: you may find it helpful to keep your scallops in 4 small piles so the numbers are easier to manage.
6) Stitch round the curved edge of every scallop with a 0.5cm seam allowance, using a short stitch length. Trim the seam allowance.
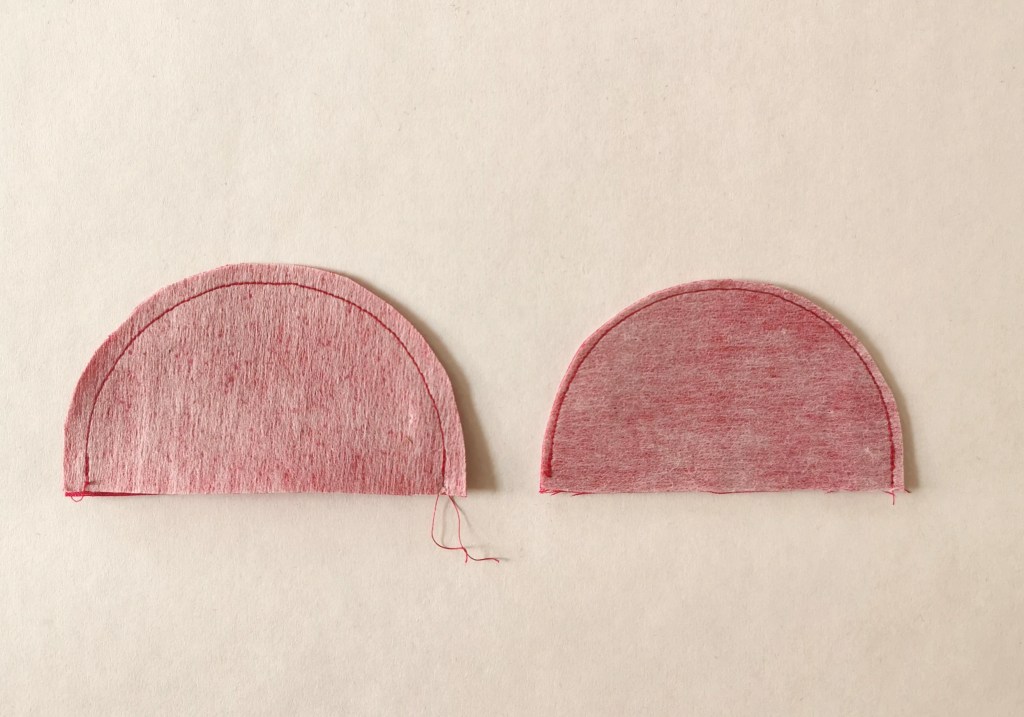
7) Turn the shapes right side out. If you have one, use a point turner to push the seam out to create a nice, smooth curve. A butter-type knife will do the same job! Press.

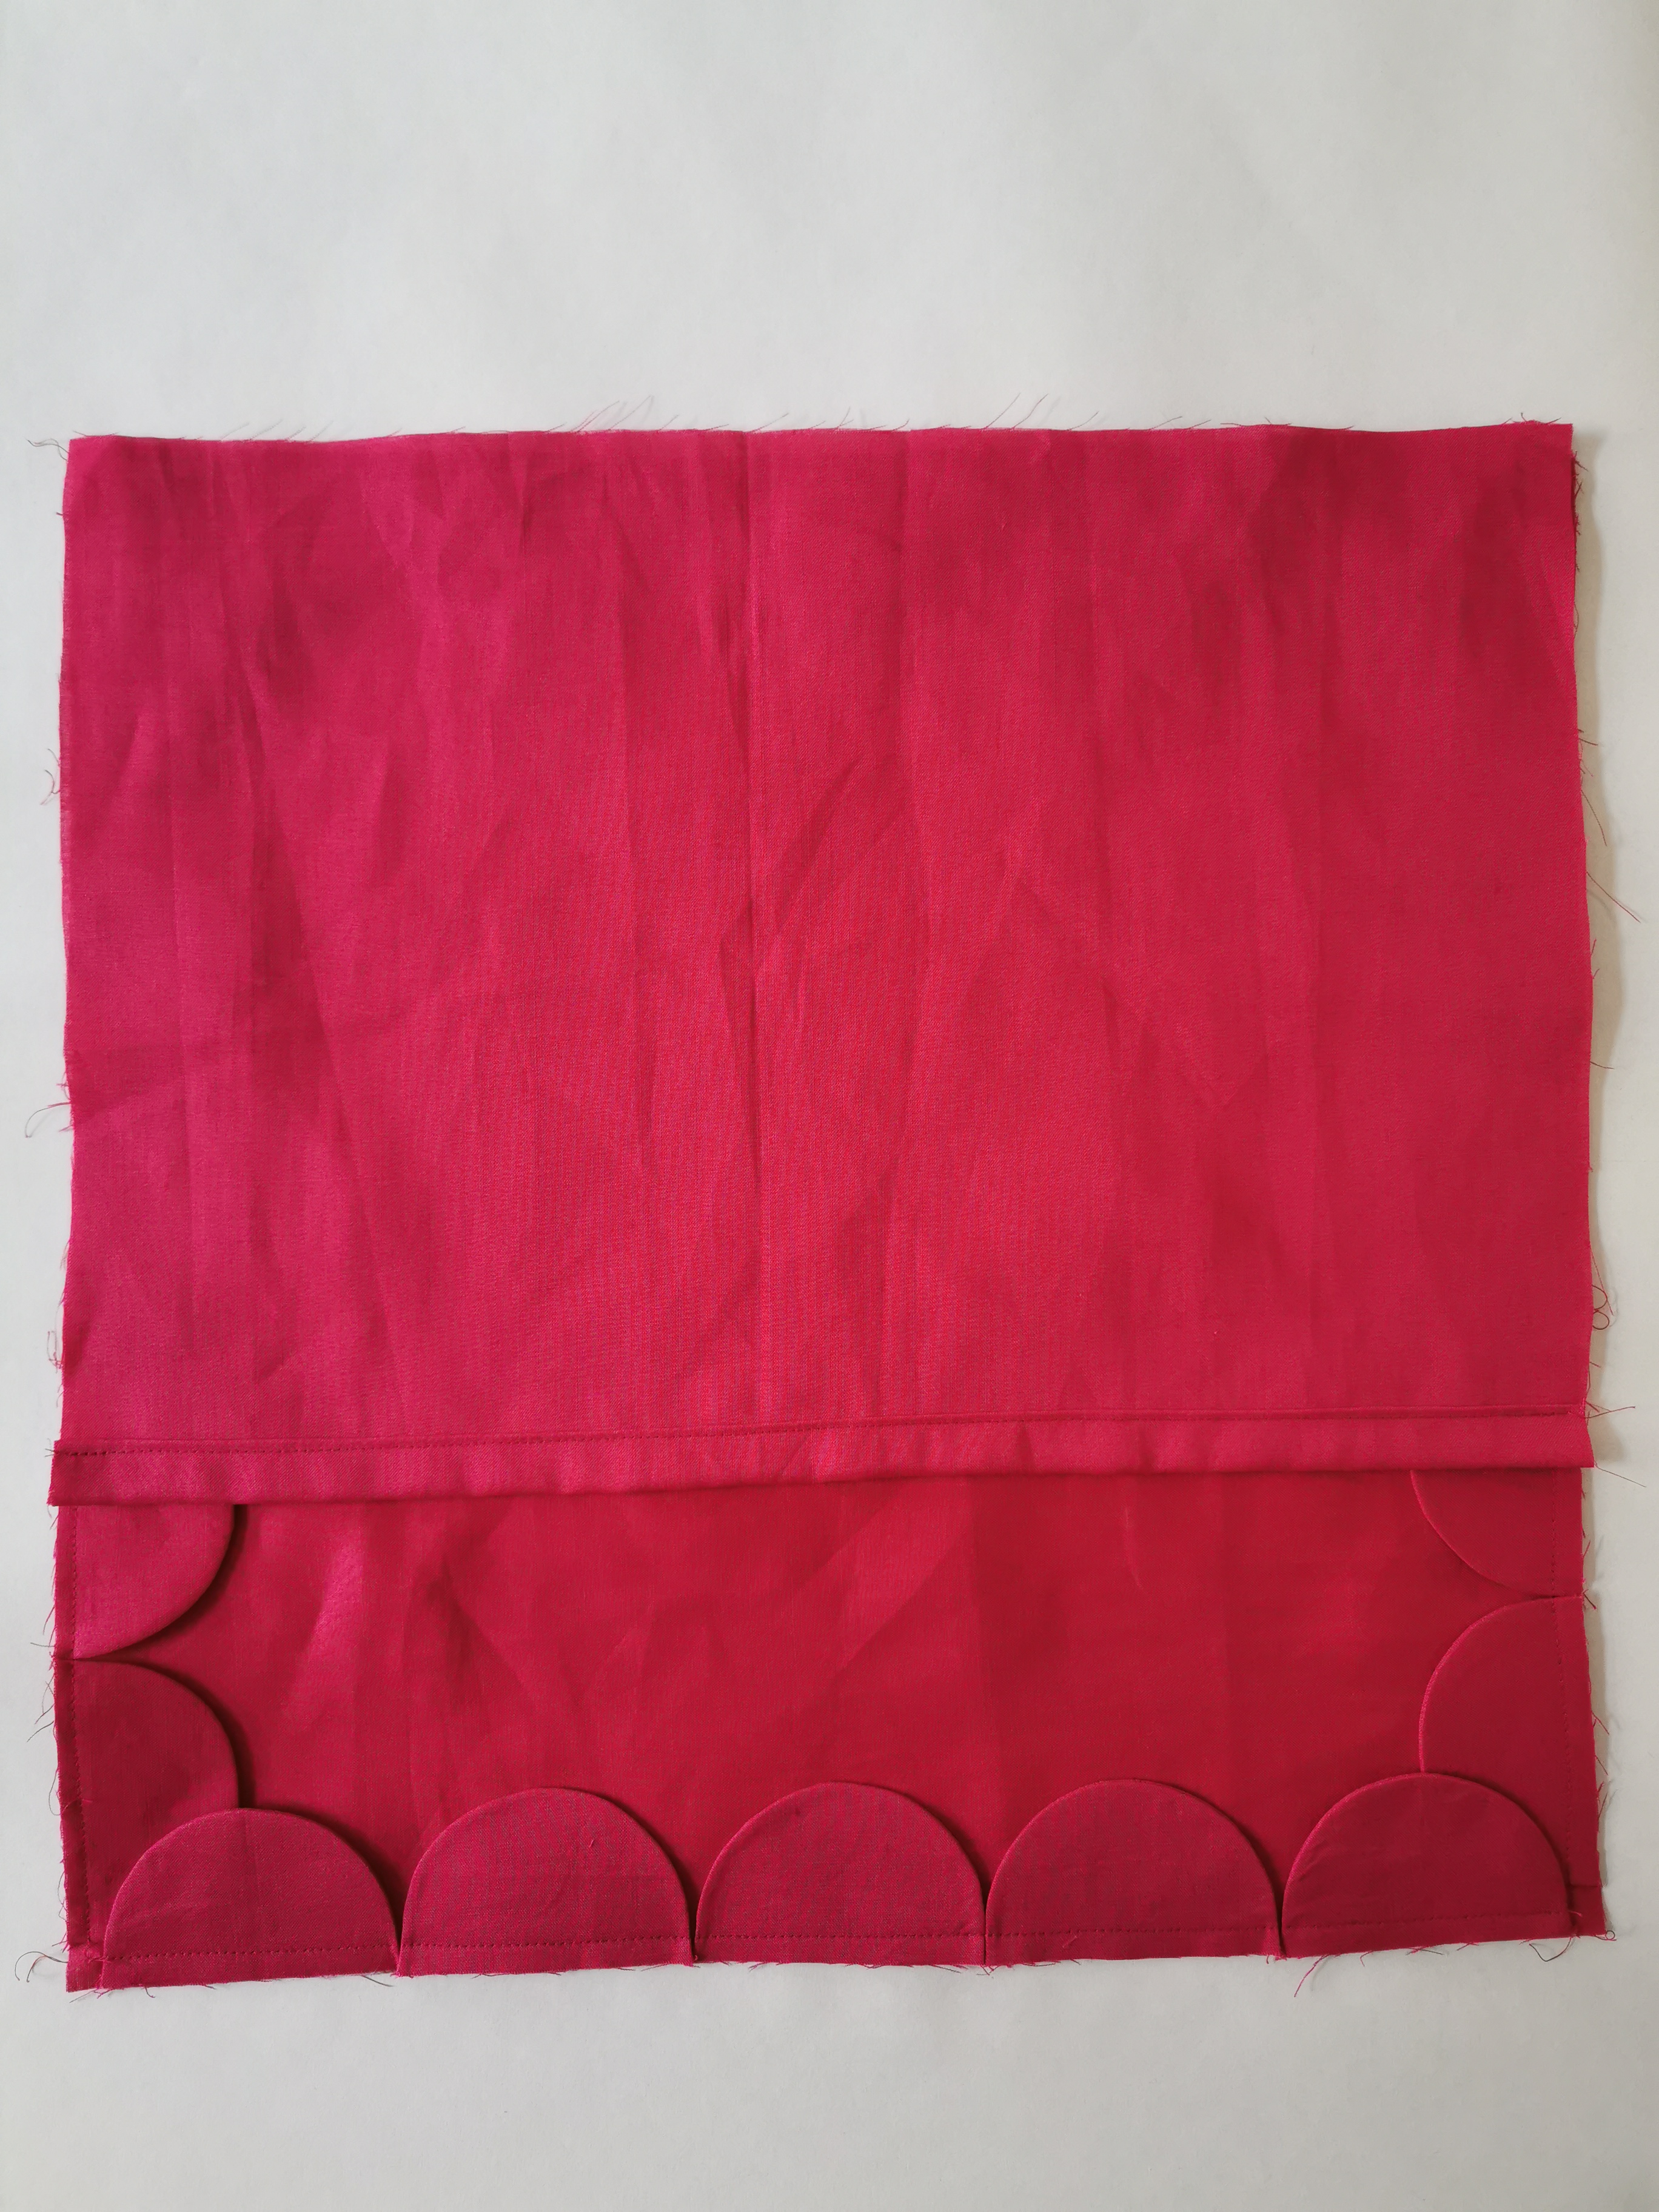
8) Now to attach the scallops to the cushion. Place your cushion front right side up. Measure 1cm down one side seam and pin one scallop shape to the edge.

9) Stitch in place within the 1cm seam allowance i.e. around 0.8cm.
Then attach the next scallop directly next to it, so their edges just touch. There’s no need to pin every scallop piece, just place the next one on the cushion and stitch in place. Work the whole way down one side of the cushion.

10) Repeat for the other 3 sides i.e. pin the first scallop piece in place 1cm in from the edge, then place and stitch the next ones down.
You’ll end up with a shape like this:

11) Take one of your back pieces. Fold over 1.5cm, then 1.5cm again along the 42cm width. Press and edge stitch in place. Repeat for the other back piece.

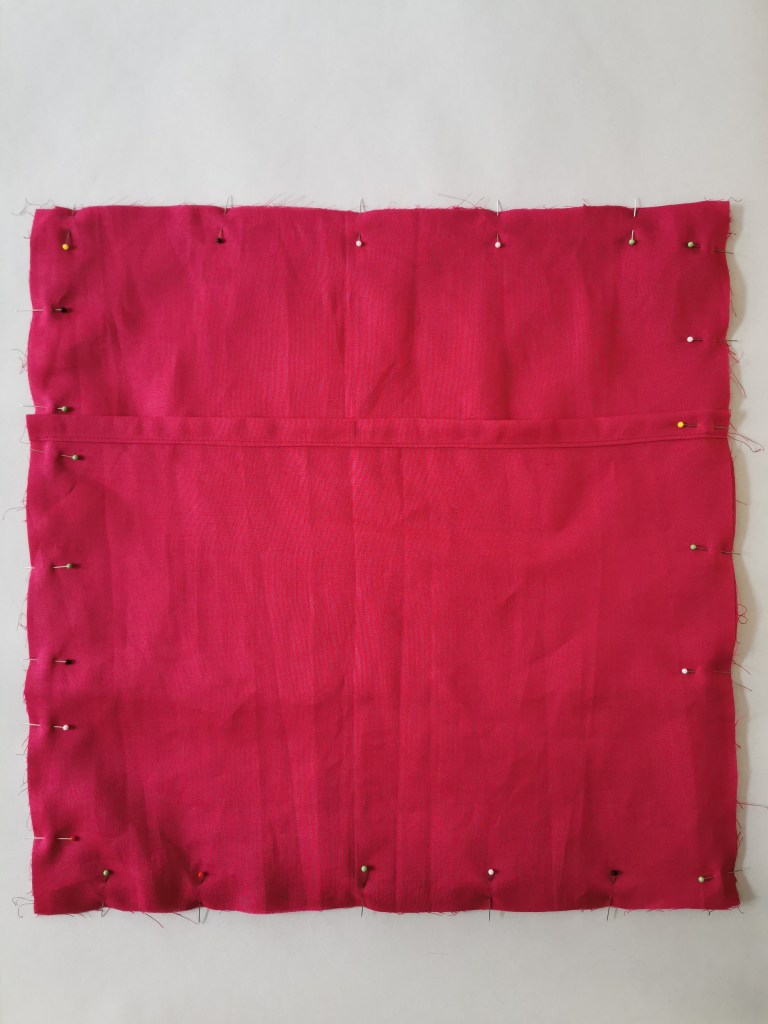
12) Place one back piece right sides together onto your cushion front.
Place the other cushion back piece on top, so the seams you stitched in step 11 are in the middle section of the cushion, and all raw edges are touching on the outside of the cushion.

13) Pin in place and stitch all the way round with a 1cm seam allowance.
Trim the corners, turn through and give it a good press.
14) Tadah! You have a really cool scallop edge cushion, with perfectly measured out scallops!
