The CocoWawa Honeycomb dress has fast become a favourite of mine, so I decided to make another one straight away! In the name of variety I decided to hack the Named Saraste dress collar onto the Honeycomb bodice. It was a learning journey, and one I thought would be good to share, as the principles can be applied to any pattern combo.

I’ve made the Saraste before, so I know the collar fits well; if you’re planning to combine two patterns, I’d say to make sure you know each element fits you. If you haven’t made either one before, make a toile! It’s not worth the fabric or your time if it goes awry!
The basic principle that I worked out is that although you’re combining two patterns, the critical joins, e.g. the armscye and sleeve, the collar and collar stand, need to be from the same pattern. In this case, I was joining the Saraste collar to the Honeycomb dress: I couldn’t simply attach the collar to the Honeycomb neckline as it wouldn’t fit; I needed to trace the Saraste neckline, so I would have Saraste collar + Saraste neckline, which I would blend onto the Honeycomb bodice.
To do this, I lay the Saraste pattern under the Honeycomb pattern and traced the Saraste neckline:
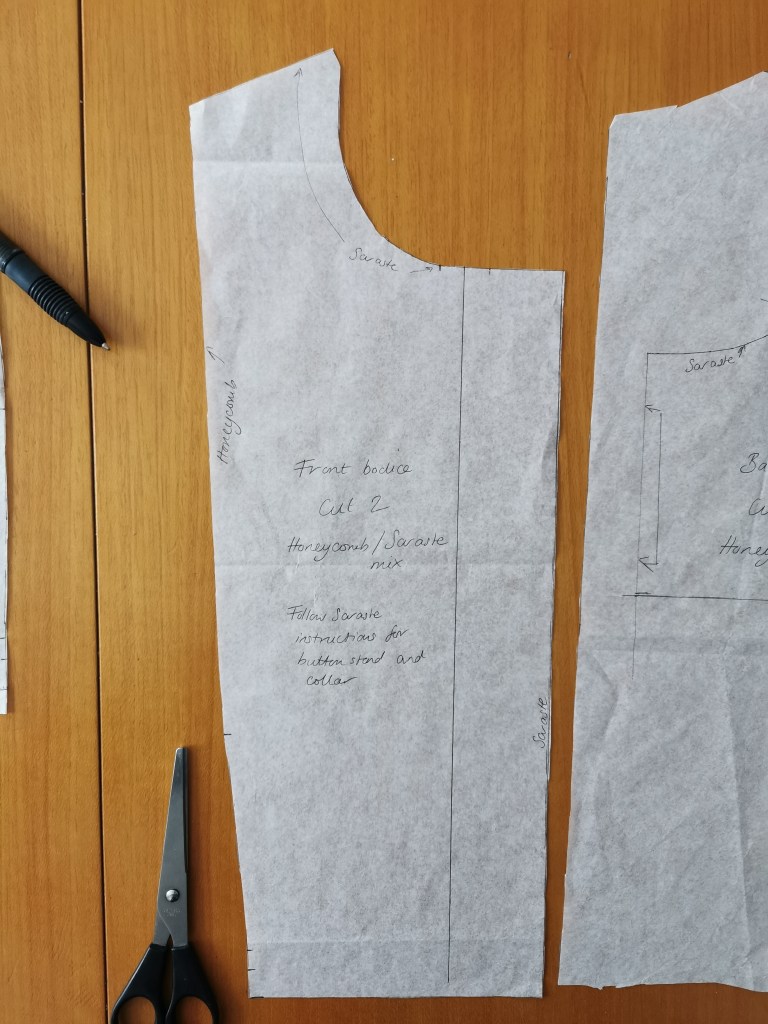
As you can see where I labelled each side seam, the neckline is the Saraste, but the side of the bodice is the Honeycomb. Both patterns button up at the front, so for ease, and to make sure it would all match up, I kept the centre front of the pattern as the Saraste (also labelled in the photo).
As for the shoulder seams…

As you can see in the photo above, I traced both patterns’ shoulder seam, and decided it would be best staying as the Honeycomb. As the main part of the dress was the Honeycomb, the shoulders and sleeve needed to stay as the Honeycomb; if I’d used the Saraste shoulder seam I think it would have skewed. As you can see with the yoke, all that was Saraste was the neckline, so it would attach to the Saraste collar stand, but the rest is Honeycomb. The lower seam of the Honeycomb back yoke (as labelled in the photo) will then attach to the Honeycomb back bodice, and Honeycomb sleeve – all the critical components of the one pattern are sewn together (This is really bloody hard to explain in writing, but hopefully you’re getting the gist!).
In the end, these were the front bodice pieces:
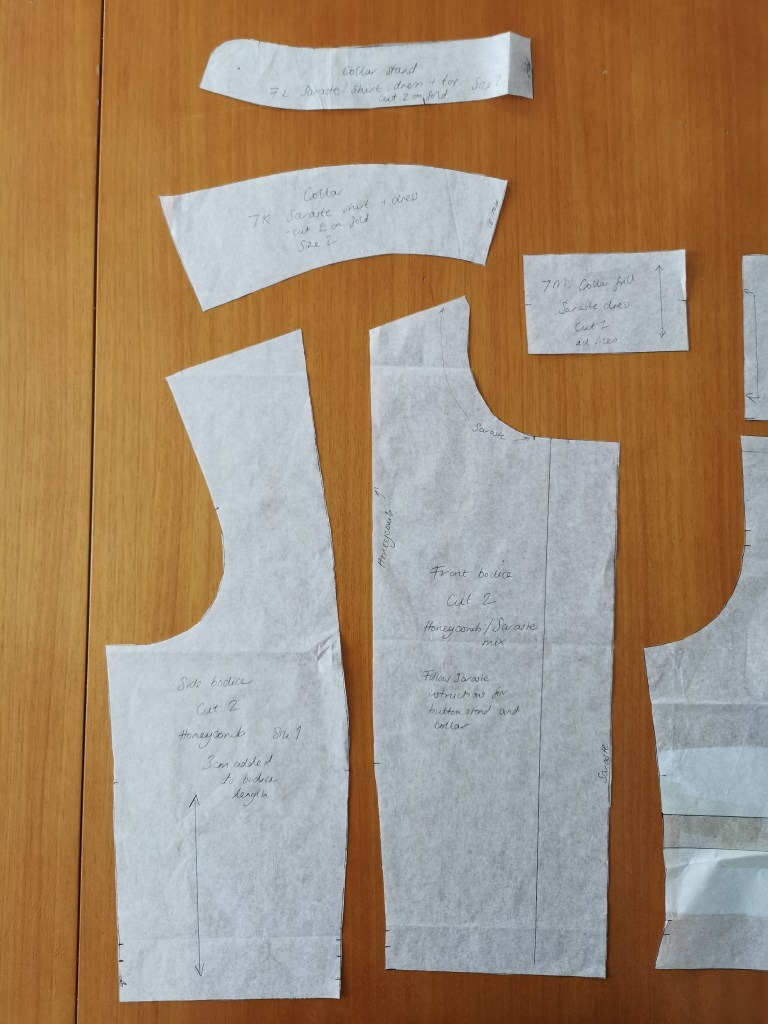
Here is where the principle hopefully makes sense: just make sure the seams you sew together are from the same pattern – the side seam of the piece named ‘Front bodice’ is Honeycomb, so that joins to the Honeycomb piece labelled ‘Side bodice’. The whole side bodice piece is Honeycomb, no Saraste needed as it doesn’t touch the collar area at all. This means the shoulder seam and sleeve will all go together fine as it’s all Honeycomb. Then the only pieces that are Saraste are the neckline, the collar and the button up front.
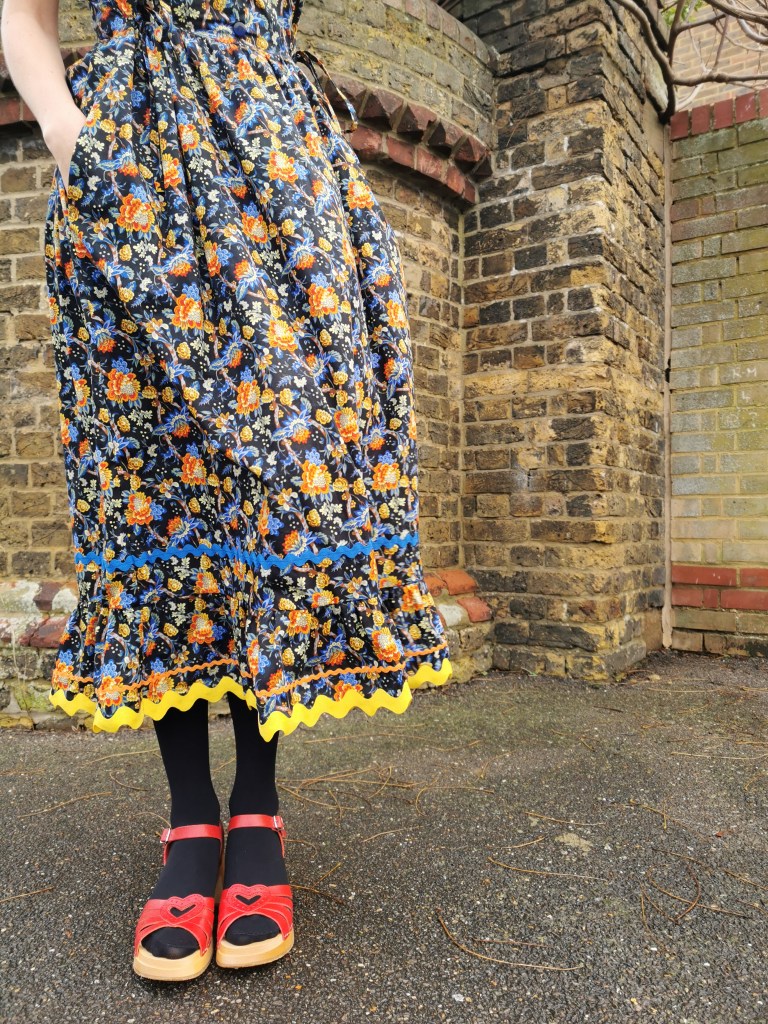
It was quite an experiment, but one that worked out well, as I love the finished dress!

I added 8cm to the width of the skirt to make it more gathered and voluminous than the previous version. I then added a ruffle, and three types of ricrac to make something a bit bonkers, but really swishy and lovely to wear!
The fabric was sent to me by Storrs London with no obligation to share, post or blog. The ricrac was from All Stitched Up. As for the patterns, you can find the CocoWawa Honeycomb dress here, and the Saraste dress is from Named’s book Breaking the Pattern, which you can find here.